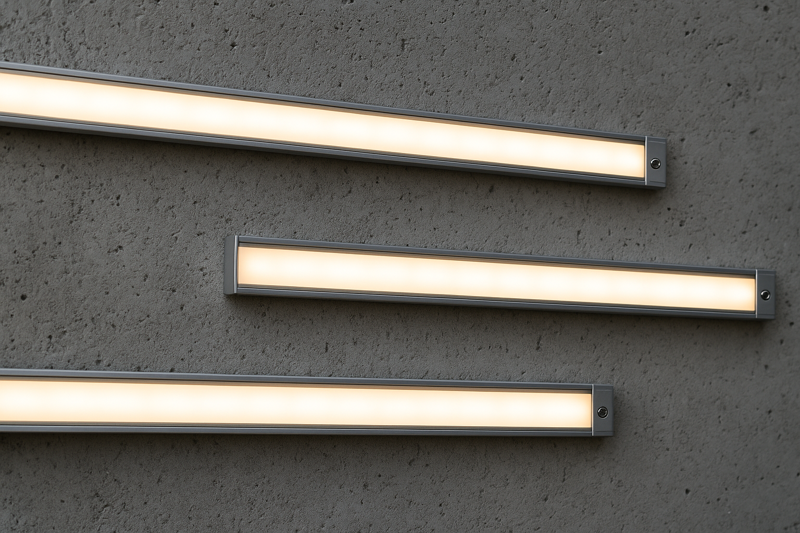
Dreaming of accenting that concrete patio wall or building facade with sleek LED strips, but intimidated by the thought of drilling into concrete? Mounting anything on concrete, especially outdoors, requires the right approach to ensure a secure, lasting, and professional-looking installation.
To mount LED strip lights on concrete walls outdoors, use mechanical fasteners like concrete screws with mounting clips or aluminum channels. Alternatively, high-strength outdoor construction adhesive can work on smooth, properly prepared surfaces, but drilling is often more reliable long-term.
As the owner of Rhlite, a factory supplying LED strip light solutions worldwide, I’ve encountered this question many times. My clients, including meticulous professionals like Tom who might be lighting designers or contractors in North America or Japan, demand solutions that are not only aesthetically pleasing but also durable enough to withstand outdoor conditions and the unforgiving nature of concrete. Let’s dive into the best practices for achieving a flawless and secure installation.
What Are the Challenges of Mounting LED Strips Directly on Concrete?
Thinking of just sticking your LED strip lights directly onto that outdoor concrete wall? Hold on a moment. Concrete presents a few unique challenges that can turn a quick job into a frustrating failure if not properly addressed.
Concrete’s hardness makes drilling difficult without proper tools. Its porous and often uneven surface offers poor adhesion for standard tapes, and it can hold moisture, affecting both the strip and adhesive over time.
Understanding these challenges is the first step to selecting the right mounting method. For my B2B clients, like wholesalers and installers, providing a product that can be reliably installed on difficult surfaces like concrete is a value proposition. The last thing anyone wants is a callback because the lights have detached or failed due to an improper mounting technique. This is a common pain point Tom would want to avoid.
Unpacking Concrete’s Difficulties
Concrete might seem like a solid, straightforward surface, but for delicate LED strips, it’s a bit of a minefield.
- Hardness and Drilling: Concrete is, by design, incredibly hard. Attempting to drill into it with standard drill bits will be frustrating and ineffective. You’ll need a hammer drill and masonry bits. This inherent toughness means any direct fixing method needs to be robust.
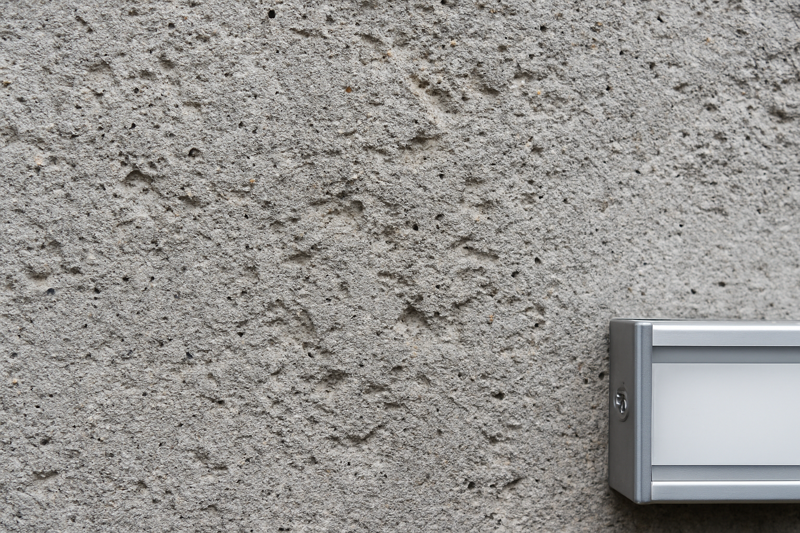
- Surface Porosity and Texture: Most outdoor concrete surfaces are not perfectly smooth like glass or painted metal. They are often porous, meaning they can absorb moisture and have a rough, uneven texture. This makes it very difficult for standard adhesive tapes (even some double-sided VHB types if not chosen carefully for the specific concrete type) to get a complete, lasting bond. Dust is also a constant issue with concrete.
- Moisture Retention1: Being porous, concrete can absorb and retain moisture from rain or ground contact. This moisture can degrade adhesives over time, cause corrosion if it reaches unprotected parts of the LED strip or connectors, and even lead to issues like efflorescence (salty deposits) that can push things off the wall.
- Thermal Expansion and Contraction: Concrete, like all materials, expands and contracts with temperature changes. While minimal, over large surfaces, this can put stress on any rigidly fixed lighting. The mounting method needs to accommodate this or be strong enough to resist it.
- Alkalinity: Concrete is alkaline, which can, over a very long time, degrade certain types_of plastics or adhesives if they are not formulated to be resistant. Most quality outdoor LED strips and mounting accessories take this into account.
I remember a project where an installer tried to use only the standard adhesive backing of an LED strip on a textured concrete garden wall. Within a few weeks, especially after a rainy period, sections started peeling off. It was a lesson in respecting concrete’s nature.
| Challenge | Description | Implication for LED Strips | Rhlite Consideration |
|---|---|---|---|
| Hardness | Difficult to drill without specialized tools (hammer drill, masonry bits) | Requires robust fixing methods; adhesive alone often insufficient | Focus on secure mechanical fixings |
| Porous/Uneven Surface2 | Poor surface area for adhesive tapes; harbors dust | Adhesives may fail prematurely; strips may not sit flat | Recommend channels or clips for even mounting |
| Moisture Retention | Absorbs and holds water, especially outdoors | Degrades adhesives, potential corrosion, efflorescence | Emphasize IP-rated strips and sealed connections |
| Thermal Expansion/Contraction3 | Concrete moves slightly with temperature changes | Can stress fixings or strips over time | Flexible strips are more forgiving |
| Dust Generation | Concrete surfaces can be dusty, hindering adhesion | Requires thorough surface preparation | Crucial pre-installation step |
Overcoming these challenges means choosing a mounting strategy that doesn’t fight concrete, but works with its properties.
Which Mounting Methods Are Best for Outdoor Concrete Walls?
So, concrete is tough. What are the most reliable and professional ways to actually get your LED strip lights securely attached to it for an outdoor setting, ensuring they stay put and look great?
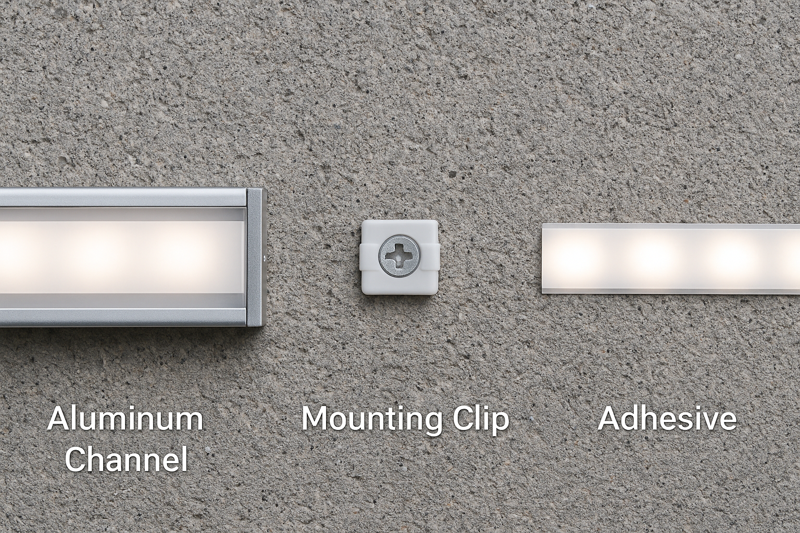
The best methods involve mechanical fastening: using aluminum channels screwed into the concrete, or dedicated mounting clips also secured with concrete screws. High-strength outdoor construction adhesive is a secondary option for very smooth, clean concrete, often supplementing mechanical fixings.
When I talk to clients like Tom, who manage projects where longevity and a professional finish are paramount, the conversation always leans towards mechanical fixings. While adhesives have their place, the surety of a screw in concrete is hard to beat for outdoor applications. At Rhlite, our LED strips are robust enough to be used with these secure methods.
Exploring Top Mounting Solutions
Let’s break down the most effective techniques for conquering concrete:
-
Aluminum Mounting Channels4 (Highly Recommended):
- How it works: LED strips are placed inside aluminum extrusions (channels/profiles). These channels are then screwed directly into the concrete wall using concrete screws or anchors.
- Pros:
- Excellent Protection: Shields the LED strip from physical impact, weather, and UV exposure.
- Heat Dissipation: The aluminum acts as a heat sink, which can prolong the life of the LEDs.
- Professional Finish: Provides a very neat, straight, and often diffused light appearance (if a diffuser cover is used). Hides wires.
- Secure Mounting: Screws provide a very strong and reliable bond to the concrete.
- Versatility: Channels come in various shapes (surface-mount, recessed, angled) to achieve different lighting effects.
- Cons:
- Higher initial cost for channels and accessories.
- More labor-intensive installation (drilling required).
- My take: For most high-quality outdoor concrete installations, this is the gold standard. I’ve seen this method used on commercial building facades and high-end residential projects with fantastic, long-lasting results.
-
Dedicated Mounting Clips5 (Good Alternative):
- How it works: Small plastic or silicone clips are screwed into the concrete at intervals. The LED strip is then snapped or slid into these clips.
- Pros:
- More discreet than channels if a very low profile is desired.
- Less expensive than channels.
- Provides a secure mechanical fixing.
- Allows for some airflow around the strip (depending on clip design).
- Cons:
- Offers less physical protection to the strip compared to channels.
- Can be more fiddly to get perfectly straight lines over long distances.
- The strip itself remains exposed.
- My take: A solid choice if channels are not desired or practical. Ensure you use UV-resistant clips specifically designed for outdoor use. Rhlite often provides compatible silicone clips for its outdoor strips.
-
High-Strength Outdoor Construction Adhesive6 (Use with Caution):
- How it works: Applying a continuous bead of specialized, high-bond, weatherproof construction adhesive (e.g., polyurethane or hybrid polymer based) to the back of the LED strip (or channel) and then pressing it onto a thoroughly cleaned and prepared smooth concrete surface.
- Pros:
- No drilling required (if used alone).
- Can provide a very clean, fixing-free look.
- Cons:
- Highly dependent on surface preparation: Concrete must be exceptionally clean, dry, and ideally sealed or primed. Failure is common on dusty or porous concrete.
- Not suitable for rough or textured concrete.
- Adhesive strength can degrade over years of outdoor exposure (UV, moisture, temperature cycles).
- Difficult to reposition or remove once cured.
- May not be strong enough for heavier strips or those in windy locations.
- My take: I typically recommend this only for very smooth, almost polished outdoor concrete, and often as a supplement to a few strategically placed mechanical fixings, rather than the sole method. For example, adhesive along a channel, with screws at either end and in the middle.
Not Recommended for Primary Outdoor Concrete Mounting: Standard double-sided tape (even strong ones) that come pre-applied to many LED strips. These are rarely sufficient for the demands of outdoor concrete.
| Mounting Method | Primary Fixing | Protection Level | Aesthetic | Difficulty | Rhlite’s Typical Recommendation |
|---|---|---|---|---|---|
| Aluminum Channels | Concrete Screws | High | Professional | Moderate | Preferred for most outdoor concrete |
| Dedicated Mounting Clips | Concrete Screws | Medium | Discreet | Moderate | Good alternative, use quality clips |
| Construction Adhesive (Alone) | Adhesive Bond | Low-Medium | Very Clean | Low (prep is key) | Risky; best for smooth surfaces or as supplement |
| Standard Strip Adhesive | Tape | Very Low | Varies | Very Low | Not recommended for outdoor concrete |
Choosing the right method comes down to the specific project requirements, budget, and desired longevity.
How Do I Prepare the Concrete Surface for Mounting LED Strips?
You’ve chosen your LED strips and the perfect mounting method. But before you can attach anything, properly preparing the concrete surface is absolutely critical, especially if any adhesive is involved. Skipping this can lead to a failed installation.
Thoroughly clean the concrete surface by removing all dust, dirt, grease, and loose debris. For adhesive methods, ensure the concrete is completely dry and consider using a concrete sealer or primer to improve adhesion on porous surfaces.
This preparation phase is non-negotiable. As a factory owner, I know that even the best quality LED strips or mounting hardware (like the ones Rhlite provides) can fail if the surface they are attached to isn’t sound. For clients like Tom, ensuring their installers follow these prep steps is key to project success and avoiding those dreaded callbacks.
Step-by-Step Concrete Surface Preparation
A clean and sound surface is the foundation of a lasting installation.
-
Thorough Cleaning:
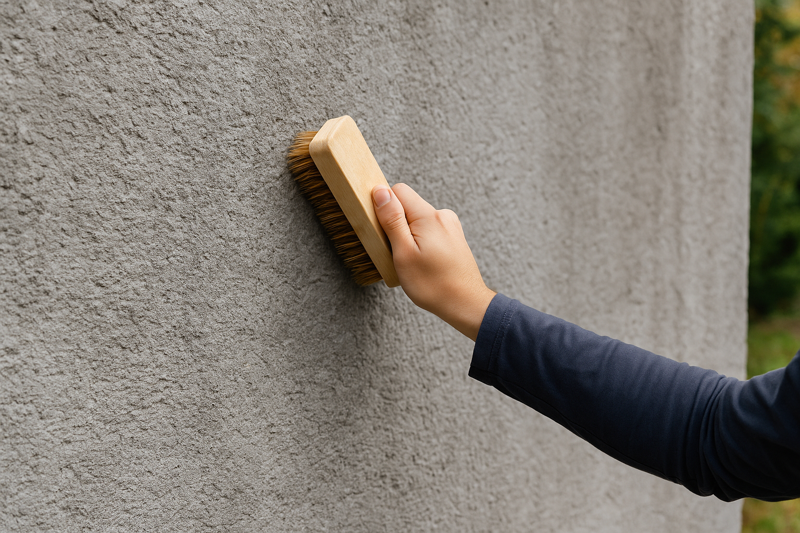
- Remove Loose Debris: Use a stiff brush or broom to sweep away all loose dust, dirt, cobwebs, and any flaking paint or concrete. A shop vacuum can be very effective here.
- Degrease (if necessary): If there are any oil or grease stains, use a concrete degreaser according to its instructions. These residues will prevent proper adhesion.
- Wash the Surface: For heavily soiled walls, consider washing with a mild detergent and water, or a pressure washer on a low setting (be careful not to damage the concrete surface or force water too deeply if it’s very porous).
- Address Efflorescence: If you see white, powdery salt deposits (efflorescence), this indicates moisture movement through the concrete. It must be removed (often with specialized cleaners or a stiff brush) and the underlying moisture issue should ideally be addressed if severe. Efflorescence can push adhesives and even some mechanical fixings off over time.
-
Ensure Complete Dryness:
- Concrete must be thoroughly dry before applying any adhesives or even some sealants. This might mean waiting 24-48 hours (or longer in cool, damp conditions) after washing or rain.
- You can test for dampness by taping a small piece of plastic sheeting to the wall. If condensation appears under the plastic after a few hours, the concrete is still too damp.
-
Smoothing (if necessary for adhesive):
- If you plan to use adhesive directly on the LED strip (not generally recommended as the primary method, but sometimes used with channels) and the concrete is very rough, you might consider lightly grinding or sanding the immediate mounting area to create a smoother profile. This is dusty work and requires proper safety gear (mask, goggles). For most screwed-in channels or clips, minor surface variations are less critical.
-
Sealing or Priming (Primarily for Adhesive Applications):
- On very porous or dusty concrete surfaces, applying a concrete sealer or a specific primer compatible with your chosen construction adhesive can significantly improve bond strength.
- The sealer/primer helps to bind the dusty surface and creates a more stable, less absorbent layer for the adhesive to grip onto.
- Always check compatibility between the sealer/primer and your adhesive.
I once saw an installation on a newly built, unsealed concrete retaining wall. The installer used a high-quality construction adhesive for the LED channels, but didn’t prime the dusty concrete first. Within a year, the fine layer of concrete dust to which the adhesive was stuck started to separate from the main wall. A simple priming step could have prevented this.
| Preparation Step | Action | Why It’s Critical | Tools/Materials Needed |
|---|---|---|---|
| 1. Cleaning | Brush, wash, degrease. Remove dust, dirt, efflorescence. | Essential for ANY mounting method, critical for adhesive. | Stiff brush, detergent, degreaser, water |
| 2. Drying | Allow concrete to dry completely (24-48+ hours after wet cleaning). | Moisture prevents adhesive curing & can cause long-term issues. | Time, moisture meter (optional) |
| 3. Smoothing (Optional) | Grind or sand very rough spots (for direct adhesive). | Improves adhesive contact area on rough surfaces. | Angle grinder with masonry disc, sandpaper |
| 4. Sealing/Priming | Apply concrete sealer or adhesive-compatible primer. | Improves adhesive bond on porous/dusty concrete. | Sealer/primer, roller/brush |
Taking the time for proper surface preparation is an investment in the longevity and reliability of your outdoor LED strip light installation.
What Tools and Hardware Are Essential for Concrete Installation?
You’ve chosen your LED strips, selected the best mounting method (likely channels or clips), and meticulously prepared the concrete surface. Now, what specific tools and hardware will you need to actually get the job done safely and effectively?
Essential tools include a hammer drill with masonry bits, concrete screws or anchors appropriate for your load, a level, measuring tape, and safety gear (goggles, gloves, dust mask). For adhesive, add a caulk gun.

Having the right tools isn’t just about convenience; it’s about safety and achieving a professional result. For my clients like contractors and installers, such as Tom’s team, using appropriate, good-quality tools is a mark of their professionalism and efficiency. At Rhlite, we provide the lighting, but we always advise on the necessary gear for a successful installation.
Your Concrete Installation Toolkit
Let’s detail the must-haves and why they’re important:
-
Drilling Equipment:
- Hammer Drill7: This is non-negotiable for concrete. A standard drill will struggle and burn out. Hammer drills combine rotation with a percussion action to pulverize the concrete as the bit turns. Corded models generally offer more power for tougher concrete.
- Masonry Drill Bits: Specifically designed for drilling into concrete, brick, and stone. They have a hardened tip (often carbide). Ensure you have the correct size bit for your chosen concrete screws or anchors. It’s good to have a few spares, as they can wear out or break.
-
Fasteners (Mechanical Fixings):
- Concrete Screws8 (e.g., Tapcon® style): These screws cut their own threads into a pre-drilled pilot hole. They are generally easy to use and provide good holding power. Choose stainless steel or a corrosion-resistant coating for outdoor use.
- Sleeve Anchors or Wedge Anchors: For heavier loads or when maximum holding power is needed (though typically overkill for LED strip channels). They expand within the pre-drilled hole.
- Plastic Plugs/Anchors with Screws: Common for lighter-duty applications. A plastic plug is inserted into a drilled hole, and a screw is then driven into the plug, expanding it. Ensure they are rated for outdoor use and the weight of your strips/channels.
-
Measuring and Layout Tools:
- Measuring Tape: For accurate placement of strips and drilling locations.
- Level (Laser or Spirit): Crucial for ensuring your LED strips or channels are installed perfectly straight and horizontal/vertical. A crooked light line looks very unprofessional.
- Pencil or Chalk Line: For marking drilling points or layout lines on the concrete.
-
Adhesive Application (if used):
- Caulk Gun: For applying construction adhesive from a tube.
- Putty Knife/Spatula: Can be useful for spreading adhesive or cleaning up excess.
-
Safety Gear (Absolutely Essential):
- Safety Goggles/Glasses9: Protect your eyes from flying concrete dust, debris, and broken drill bits.
- Dust Mask (N95 or better): Concrete dust contains silica, which is harmful if inhaled.
- Work Gloves: Protect your hands during drilling and handling materials.
- Hearing Protection: Hammer drills can be loud.
-
Other Useful Items:
- Extension Cord (heavy-duty, outdoor rated): For your hammer drill if it’s corded.
- Wire Strippers/Cutters: For preparing LED strip wiring.
- Screwdriver or Drill Driver Bit: For driving screws (if not using an impact driver for concrete screws).
- Cleaning Supplies: Brushes, rags, cleaning solutions as discussed in surface preparation.
I’ve seen DIY attempts where someone tried to use a regular drill on concrete – it resulted in a burnt-out drill, barely a dent in the wall, and a lot of frustration. Using the correct tools from the start, like a hammer drill, makes the job manageable and safer. For professional installers, investing in good quality tools pays off in efficiency and the quality of the finished work.
| Tool/Hardware Category | Specific Items | Purpose in Concrete Installation | Why It’s Important for Outdoor Use |
|---|---|---|---|
| Drilling | Hammer Drill, Masonry Bits | Creating pilot holes in hard concrete efficiently | Essential for mechanical fixing |
| Fastening | Concrete Screws, Anchors (corrosion-resistant) | Securely attaching channels/clips to the concrete | Must resist outdoor elements |
| Layout & Measurement | Measuring Tape, Level, Marker | Ensuring straight, accurate, and professional placement | Aesthetics and proper function |
| Adhesive Application | Caulk Gun (for construction adhesive) | Applying adhesive evenly and controllably | If using adhesive method |
| Safety Gear | Goggles, Dust Mask (N95+), Gloves, Hearing Protection | Protecting installer from injury and health hazards | Non-negotiable for safety |
Having this toolkit ready before you start will make the installation process smoother, safer, and more successful.
Conclusion
Mounting LED strips on outdoor concrete walls successfully hinges on choosing robust methods like channels or clips with concrete screws, diligent surface preparation, and using the right tools. This ensures a durable, safe, and visually stunning lighting outcome.
-
Understanding moisture retention in concrete is crucial for ensuring the longevity of LED strip installations. Explore this link for detailed insights. ↩
-
Learn how porous surfaces impact adhesive performance for LED strips, ensuring a secure installation. This resource provides valuable information. ↩
-
Discover how temperature changes affect LED strip installations in concrete, helping you choose the right mounting method. This link offers essential guidance. ↩
-
Explore the advantages of aluminum mounting channels for LED strips, including protection and heat dissipation, to enhance your installation. ↩
-
Learn about dedicated mounting clips for LED strips, their benefits, and how they can provide a discreet and secure installation. ↩
-
Discover the uses and precautions of high-strength outdoor construction adhesive for LED strip installations, ensuring a clean and effective application. ↩
-
Understanding the significance of a Hammer Drill can enhance your concrete drilling efficiency and safety. ↩
-
Learn about Concrete Screws to ensure secure and durable installations, especially in outdoor environments. ↩
-
Discover the critical role of Safety Goggles in protecting your eyes from hazards during concrete work. ↩


