Excited to illuminate your outdoor space with LED strips but worried about safety? Proper installation is key to avoiding electrical hazards, ensuring longevity, and achieving that stunning lighting effect without any mishaps.
To install outdoor LED strip lights safely, always turn off the mains power first. Use IP-rated waterproof connectors, compatible low-voltage power supplies, and ensure all connections are sealed against moisture. Follow local electrical codes.
As the owner of Rhlite, a factory specializing in LED strip light solutions, I’ve seen firsthand how a well-planned installation ensures both breathtaking results and complete peace of mind. My clients, including experienced professionals like Tom who might be contractors or lighting designers, understand that safety isn’t just a buzzword – it’s a fundamental requirement for any electrical work, especially outdoors where conditions can be challenging. Let’s walk through the essential safety steps.
What Are the Essential Safety Precautions Before Starting Installation?
Ready to jump in and start installing those outdoor LED strips? Hold on! Before you even unroll the first strip or touch a wire, a few critical safety precautions can prevent accidents and ensure a smooth process.
The most crucial first step is to completely turn off the main power supply to the circuit you’ll be working on. Also, gather all necessary tools, safety gear, and plan your layout thoroughly.

This initial phase is all about preparation and minimizing risks. I always tell my clients, whether they’re seasoned installers or ambitious DIYers (though for outdoor, professional help is often best), that rushing this stage is a recipe for problems. For someone like Tom, who values quality control, these preliminary checks are second nature, but they bear repeating for everyone. A little extra time spent here can save a lot of trouble – and potential danger – later on.
1. Power Off and Verify!
This is non-negotiable.
- Turn Off the Breaker: Locate the circuit breaker1 in your electrical panel that controls the power to the area where you’ll be installing the lights. Switch it to the OFF position.
- Lockout/Tagout2 (for professionals): In a commercial or professional setting, use lockout/tagout procedures to ensure the circuit cannot be accidentally re-energized.
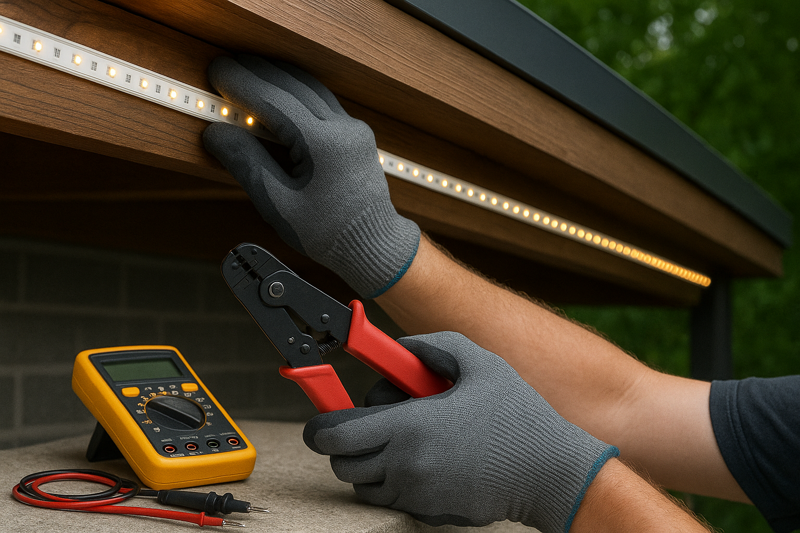
- Test with a Voltage Tester: After turning off the breaker, always use a reliable non-contact voltage tester3 or a multimeter to confirm that there is no power present at the wires or outlet you intend to use. Don’t assume the breaker is correctly labeled or functioning. I once heard of an installer who got a nasty shock because a mislabeled breaker was turned off – always test!
2. Gather Your Tools and Safety Gear:
Having everything ready prevents a rushed or improvised approach.
- Safety Glasses: Protect your eyes from debris, especially if drilling or cutting.
- Insulated Gloves: Recommended when working with any electrical wiring, even low voltage.
- Proper Tools: Wire strippers, screwdrivers with insulated handles, pliers, measuring tape, a drill (if needed), silicone sealant, and appropriate IP-rated connectors for outdoor use.
- Ladder (if needed): Ensure it’s stable and suitable for the height.
3. Plan Your Layout and Measurements:
- Measure Twice, Cut Once: Accurately measure the lengths of LED strip needed. Most strips have designated cut marks.
- Power Supply Location: Determine a safe, dry, and accessible location for the LED power supply (driver). If the power supply itself isn’t IP-rated for direct outdoor exposure, it must be housed in a suitable weatherproof enclosure.
- Cable Runs: Plan the routes for your low-voltage cables from the power supply to the LED strips. Avoid areas where they could be damaged.
4. Check Local Electrical Codes:
- Compliance is Key: Outdoor electrical installations are often subject to specific local codes and regulations regarding wiring methods, burial depths for cables, and types of enclosures. Familiarize yourself with these or consult a qualified electrician. For my clients exporting to North America or Japan, ensuring products can meet these local codes is part of our Rhlite quality assurance.
Taking these preliminary steps seriously sets the stage for a safe and successful installation.
| Pre-Installation Step | Action Required | Why It’s Critical for Safety | Rhlite Best Practice Emphasis |
|---|---|---|---|
| 1. Power Off & Verify | Turn off breaker, test for no voltage | Prevents electric shock, the #1 hazard | Absolutely non-negotiable first step |
| 2. Gather Tools & Gear | Safety glasses, insulated gloves, proper tools | Prevents injury, ensures efficient work | Use quality, insulated tools |
| 3. Plan Layout & Measure | Determine strip lengths, PSU location, cable routes | Avoids errors, ensures aesthetic and functional outcome | Minimizes re-work and potential cable damage |
| 4. Check Local Codes | Research or consult electrician on local regulations | Ensures legal compliance, avoids future issues | Crucial for professional, warrantable installs |
| 5. Inspect Products | Check strips, PSU, connectors for damage before install | Prevents installing faulty or unsafe components | Part of our factory QC, but good final check |
A methodical start is the foundation of a safe finish.
How Should I Properly Connect and Seal Outdoor LED Strip Lights and Power Supplies?
You’ve prepped and planned, and the power is off. Now, how do you make the actual electrical connections for your outdoor LED strips securely and, most importantly, in a way that keeps water out? This is where attention to detail is crucial.
Use IP-rated waterproof connectors specifically designed for outdoor LED strips. Ensure all wire connections are tight, correctly polarized, and then thoroughly seal all joints, end caps, and power supply connections with silicone sealant or heat shrink tubing to prevent moisture ingress.
This is where many DIY installations can go wrong if not done carefully, leading to the very pain points Tom mentioned, like inefficient performance or premature failure due to moisture. Even for professionals, using the right components and techniques for sealing is paramount for outdoor longevity. At Rhlite, we sometimes offer compatible IP-rated connectors with our outdoor LED strips because we know how vital these small parts are to the overall system integrity.
Connecting the LED Strip:
- Cutting the Strip: If you need to shorten the strip, only cut along the designated cut marks (usually marked with a scissor icon). Cutting elsewhere will damage the circuit.
- Using Connectors:
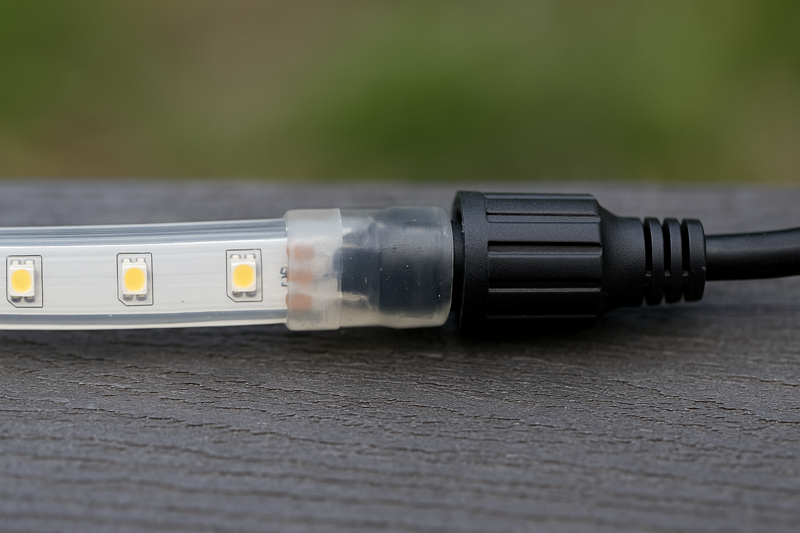
- IP-Rated Solderless Connectors: These are convenient but ensure they are specifically rated for outdoor use (e.g., IP67). They typically clamp onto the strip’s copper pads. Follow the manufacturer’s instructions carefully to ensure a good connection and proper seal.
- Soldering (Recommended for Best Seal): For the most robust and reliable connection, especially for IP67 or IP68, soldering wires directly to the strip’s copper pads is often preferred by professionals. After soldering, the connection must be made waterproof.
- Waterproofing Soldered Connections:
- Adhesive-Lined Heat Shrink Tubing: Place a piece of heat shrink tubing (with an inner adhesive lining) over the soldered joint. When heated, it shrinks and the adhesive melts, creating a tight, waterproof seal.
- Silicone Sealant and End Caps: Apply non-corrosive, outdoor-grade silicone sealant around the connection and then fit a silicone end cap (often filled with more sealant) over the end of the strip.
Connecting to the Power Supply:
- Correct Polarity: LED strips are polarity sensitive. Ensure the positive (+) wire from the strip connects to the positive (+) output on the power supply, and negative (-) to negative (-). Reversing polarity can damage the strip. Wires are usually color-coded (e.g., red for +, black for -).
- Secure Wire Connections: Whether using screw terminals on the power supply or wire nuts (in a suitable weatherproof junction box), ensure connections are tight. Loose connections can cause arcing, overheating, or intermittent operation.
- Power Supply Enclosure: If your LED power supply (driver) is not itself IP-rated for direct outdoor exposure (e.g., if it’s an IP20 driver), it must be installed inside a NEMA-rated or IP-rated weatherproof electrical enclosure. This enclosure must also have waterproof cable glands for wires entering and exiting to maintain the seal. Many of Rhlite’s power supplies for outdoor use are already IP67 rated, simplifying this.
Sealing Everything:
- End Caps: The end of any LED strip run must be sealed with a silicone end cap4 filled with silicone sealant to prevent water from wicking into the strip.
- All Connection Points: Any point where a wire enters an enclosure, connects to another wire, or joins the strip is a potential entry point for moisture. Be meticulous with sealing.
- Silicone Choice: Use a neutral-cure (non-acetic) silicone sealant suitable for electronics and outdoor use. Acetic cure silicones can corrode copper.
I once visited a project in Singapore where an installer used indoor-grade connectors for an outdoor facade lighting project. Within months, during the rainy season, multiple sections failed due to corrosion. It was a costly lesson for them in the importance of using proper IP-rated components and sealing techniques.
| Connection/Sealing Task | Recommended Method | Key Safety/Reliability Factor | Rhlite Product Tie-in (If Applicable) |
|---|---|---|---|
| Cutting LED Strip | Only at designated cut marks | Prevents damage to strip circuitry | Clear cut marks on Rhlite strips |
| Joining Strip to Wire | IP-rated connectors or solder + adhesive heat shrink | Crucial for waterproofing and reliable connection | Rhlite may offer compatible IP67 connectors |
| Connecting to Power Supply | Correct polarity, tight connections | Prevents damage, ensures proper operation, avoids heat | Match Rhlite strip voltage to Rhlite PSU |
| Waterproofing All Joints | Silicone sealant, heat shrink, IP-rated end caps | Prevents moisture ingress, corrosion, failure | Emphasize importance with outdoor strips |
| Housing Non-IP Rated PSU | Use NEMA/IP-rated weatherproof enclosure | Protects PSU from elements, ensures safety | Rhlite offers IP67 power supplies |
Meticulous connection and sealing are the difference between a lasting installation and an early failure.
What Are the Best Practices for Mounting and Securing Outdoor LED Strips Safely?
You’ve made your connections perfectly, and everything is sealed. Now, how do you physically attach the LED strips to surfaces outdoors in a way that’s secure, looks good, and won’t cause problems down the line?
Use appropriate mounting hardware like silicone clips, aluminum channels, or high-quality outdoor-rated adhesive. Ensure the surface is clean and dry before mounting, and provide strain relief for cables to prevent damage to connections.
The physical mounting is just as important as the electrical work for long-term safety and performance. A poorly mounted strip can sag, detach, or put stress on connections, leading to failures or even hazards. For clients like Tom, who are involved in architectural lighting or installations that need to look professional and last, the mounting method is a key detail. At Rhlite, while we provide the flexible strip, we always advise on best practices for securing it.
Choosing Your Mounting Method:
The best method depends on the surface, the type of LED strip, and the desired aesthetic.
- Adhesive Backing (with caution outdoors)5: Many LED strips come with 3M adhesive backing. While convenient, its long-term reliability outdoors can be compromised by temperature fluctuations, moisture, and UV exposure, especially on rough or porous surfaces. For outdoor use, adhesive should ideally be supplemented with other fixing methods. If relying heavily on adhesive, ensure it’s a high-bond, outdoor-rated type and the surface is impeccably clean (use isopropyl alcohol to prep).
- Mounting Clips (Silicone or Plastic)6: These are small brackets that screw into the mounting surface and then clip over the LED strip.
- Pros: Provide a secure hold, allow for easy removal if needed, suitable for uneven surfaces. Use corrosion-resistant screws for outdoor use.
- Cons: Can be more visible than other methods if not chosen carefully.
- Rhlite often recommends silicone clips for our outdoor strips as silicone is durable and gentle on the strip’s casing.
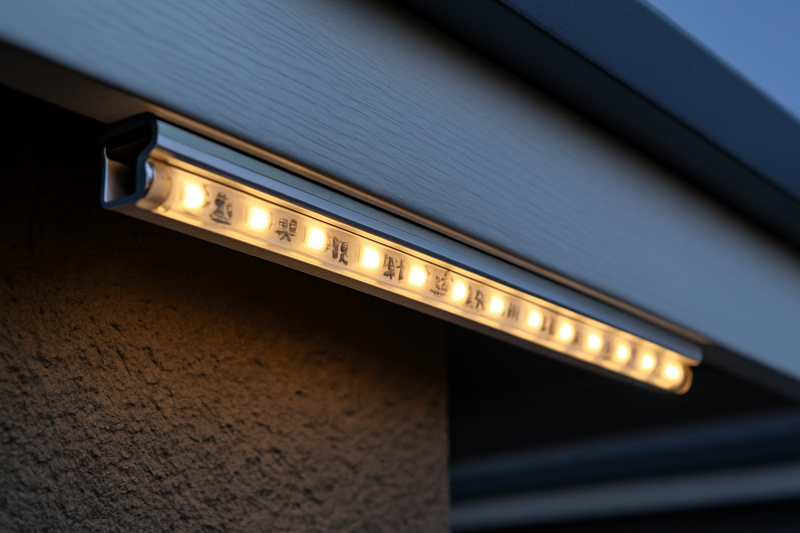
- Aluminum Mounting Channels/Profiles7: LED strips can be installed inside aluminum channels, which are then screwed or fixed to the surface.
- Pros: Provides excellent physical protection, acts as a heat sink (can prolong LED life), offers a neater and more professional appearance, can include diffusers for softer light.
- Cons: Adds to the cost and installation complexity. Ensure channels are suitable for outdoor use (e.g., anodized or powder-coated aluminum to resist corrosion).
- Direct Screwing (for some specialized rigid strips only): Not typically for flexible strips, but some rigid outdoor LED bars have pre-drilled mounting holes.
Best Practices for Secure Mounting:
- Surface Preparation: Clean the mounting surface thoroughly. Remove any dust, grease, or loose paint. For adhesive, a smooth, non-porous surface works best.
- Strain Relief: Ensure that the weight of the cables or any accidental tugs do not pull directly on the LED strip connection points. Secure the cable near the connection using P-clips or cable ties. This is a common point of failure if overlooked. I’ve seen installations where wind movement caused cables to eventually fatigue and break the solder joints on the strip.
- Consider Expansion/Contraction: Materials expand and contract with temperature changes. For very long runs, especially with aluminum channels, allow for slight thermal expansion to prevent buckling. Flexible LED strips are generally more forgiving.
- Avoid Sharp Bends or Kinks: While flexible, LED strips have a minimum bend radius. Bending them too sharply can damage the internal circuitry.
- Cable Management: Neatly route and secure any exposed low-voltage wiring using UV-resistant cable clips or conduit suitable for outdoor use to protect it from physical damage, UV degradation, and becoming a trip hazard.
Imagine a contractor installing LED strips under the capstones of a retaining wall. They would need to ensure the surface is clean, use strong outdoor adhesive perhaps supplemented with small clips, and carefully route the low-voltage wire behind the wall or in a discreet conduit to protect it.
| Mounting Aspect | Best Practice | Safety/Longevity Implication | Rhlite Guidance Emphasis |
|---|---|---|---|
| Surface Preparation | Clean, dry, (use alcohol for adhesive) | Ensures good adhesion, prevents premature detachment | Critical for any adhesive-based mounting |
| Choosing Fixture | Clips, outdoor-rated adhesive, aluminum channels | Secures strip, protects it, enhances lifespan | Recommend silicone clips or quality channels |
| Strain Relief for Cables | Secure cable near connections (P-clips, ties) | Prevents stress on solder joints/connectors, avoids breaks | Often overlooked but vital for durability |
| Avoid Sharp Bends | Respect minimum bend radius of the strip | Prevents damage to PCB and internal circuits | Specified in Rhlite product datasheets |
| Cable Management | Use UV-resistant clips/conduit for exposed wires | Protects wires from damage, UV, trip hazards | Ensures a professional and safe finish |
Secure and thoughtful mounting protects your investment and ensures the lights stay put and shine bright safely for years.
How Do I Test the Installation Safely After Everything is Connected?
All connections are made, sealed, and the strips are mounted. Before you call the job done and flip the main power back on, there’s one more crucial safety and functionality check: testing. But how do you do this final step safely?
After a final visual inspection of all connections and sealing, and ensuring no tools or loose wires are present, you can restore power at the breaker. Test the lights, check for any flickering, hot spots, or inconsistencies.
This final step is your opportunity to catch any issues before they become bigger problems. For a business like Rhlite, which prides itself on top-quality products, ensuring the system works perfectly upon installation is key to customer satisfaction. Tom, as a buyer or project manager, would also expect this diligence from his installers.
The Safe Testing Procedure:
-
Final Visual Inspection (Power Still Off):
- Double-check all connections: Are they secure? Is polarity correct?
- Inspect all seals: Are end caps in place? Are waterproof connectors properly closed? Is silicone sealant applied where needed?
- Look for exposed wires: Ensure no bare wires are touching each other or any metal surfaces (other than their intended connection points).
- Clear the area: Remove all tools, spare wires, and debris from the installation area.
-
Restore Power (Cautiously):
- Ensure everyone is clear of the installation.
- Go to the electrical panel and switch the circuit breaker back to the ON position.
- If the breaker trips immediately, there is likely a short circuit. TURN THE BREAKER OFF AGAIN IMMEDIATELY and re-inspect all wiring and connections. Do not repeatedly try to turn on a breaker that trips. This indicates a serious fault that needs to be found and fixed. This is a pain point Tom has experienced with faulty supplier products or poor installation in the past.
-
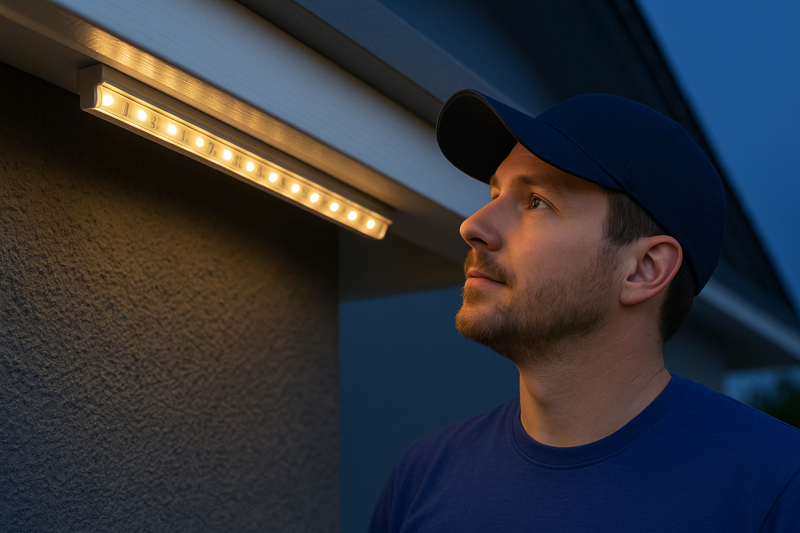
Observe the Lights:
- Functionality: Do all the LED strips light up as expected? Is the color and brightness consistent along the entire length?
- Flickering: Watch for any flickering or intermittent operation, which could indicate a loose connection or a problem with the power supply or controller.
- Hot Spots: Carefully (and briefly, if directly touching the strip, though it’s low voltage) feel along the strip and connections for any unusual hot spots. While LEDs and power supplies do generate some heat, excessive heat can indicate an overloaded circuit, poor connection, or faulty component.
- Controller Test (if applicable): If you have a dimmer or RGB controller, test all its functions (dimming up/down, color changes, effects).
-
Address Any Issues (Power Off Again):
- If you observe any problems, turn the power off at the breaker again before attempting any adjustments or troubleshooting.
- Common issues and checks:
- Section of strip not lit: Check connection to that section, or if it’s at the end of a long run, it could be voltage drop (though less common with proper planning and 24V systems).
- Flickering: Often a loose wire nut, terminal screw, or solderless connector.
- Wrong colors (RGB): Check RGB wire order at controller and strip.
-
Long-Term Test (Optional but Recommended):
- Once everything seems okay, let the lights run for a few hours and then re-check for any developing issues, especially heat.
This systematic testing ensures that your installation is not only functional but also operating safely. For my clients like lighting designers or wholesalers, providing clear testing guidelines can also be part of the value-added service, reducing future support claims.
| Testing Step | Action | Safety Focus | What to Look For |
|---|---|---|---|
| 1. Final Visual Inspection | Check all connections, seals, wire exposures (POWER OFF) | Identify obvious faults before energizing | Loose wires, bad seals, incorrect polarity |
| 2. Restore Power | Switch breaker ON cautiously | Be ready to switch OFF if breaker trips | Immediate breaker trip indicates a short circuit |
| 3. Observe Lights | Check for full illumination, consistency, no flicker | Identify operational issues | Dead sections, flickering, dimming, color issues |
| 4. Check for Heat | Carefully feel for unusual hot spots on strips/connections/PSU | Identify overloading or bad connections | Excessive heat |
| 5. Test Controllers | Verify all functions of dimmers/RGB controllers | Ensure full system functionality | Unresponsive controls, incorrect modes |
| 6. Address Issues | Turn power OFF before troubleshooting | Avoid working on a live circuit | Find and fix loose connections, shorts, etc. |
Thorough testing is the final seal of approval on a safe and successful outdoor LED strip light installation.
Conclusion
Installing outdoor LED strips safely involves careful planning, correct components, meticulous connections, proper sealing, and thorough testing. Prioritize safety at every step for a beautiful, lasting result.
-
Knowing how circuit breakers function can help you prevent electrical hazards. This resource provides essential information on their operation and safety. ↩
-
Learning about Lockout/Tagout procedures is crucial for safety in electrical work, especially in professional settings. Check this link for comprehensive guidelines. ↩
-
Understanding how a non-contact voltage tester works can enhance your safety during electrical installations. Explore this resource for detailed insights. ↩
-
Understanding silicone end caps is crucial for ensuring the longevity and waterproofing of LED strip installations. Explore this resource for detailed insights. ↩
-
Explore this resource to learn about the best adhesive options and tips for outdoor LED strip installation, ensuring durability and effectiveness. ↩
-
Discover the benefits of silicone mounting clips for LED strips, including their durability and ease of use, perfect for outdoor applications. ↩
-
Learn how aluminum channels enhance LED strip installations by providing protection and a professional look, making them ideal for outdoor use. ↩


