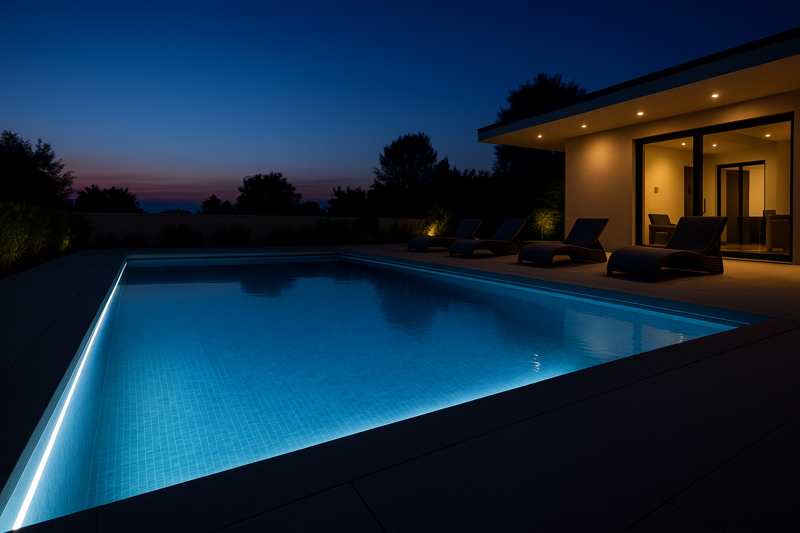
Your client wants stunning landscape lighting. You install brand-new "waterproof" LED strips around their pool deck, but after one season, the lights are yellow, cracked, and failing. The beautiful effect is ruined, and now you have an expensive callback on your hands.
Choosing the right product goes beyond the IP rating. You must match the IP rating (e.g., IP67, IP68) to the application and, crucially, verify the waterproofing material is high-grade, UV-stable silicone, not cheap epoxy or PVC that will degrade outdoors.
I’ll never forget a call I got from a landscape architect in Florida. He had specified IP67 strips from another supplier for a high-end coastal residence. They were installed under the capstones of a series of retaining walls—a huge amount of labor. Six months later, his team was back on site ripping everything out. The strips, which were coated in a clear epoxy, had turned a sickly yellow and were brittle from the intense sun. He told me, "Jermey, the spec sheet said ‘IP67’ and ‘outdoor-rated.’ I thought I did my homework." That’s when I explained that the IP rating only tells you about water and dust ingress. It tells you nothing about the material’s ability to withstand sunlight, saltwater, or chlorine. That day, we switched his entire specification to our solid silicone extrusion products. It was a tough lesson for him, but it highlights a critical truth: for outdoor lighting, the material matters just as much as the IP rating.
What Do IP Ratings Actually Mean for an Installer?
You see IP65, IP67, and IP68 on spec sheets. They look similar, and the supplier might use the word "waterproof" for all of them. Using an IP65 strip where you need an IP68 can lead to total project failure and a client who has lost trust in your expertise.
IP stands for Ingress Protection. The first digit rates protection against solids (like dust), and the second digit rates protection against liquids (water). Higher numbers mean better protection. They describe specific levels of resistance, not a general "waterproof" state.
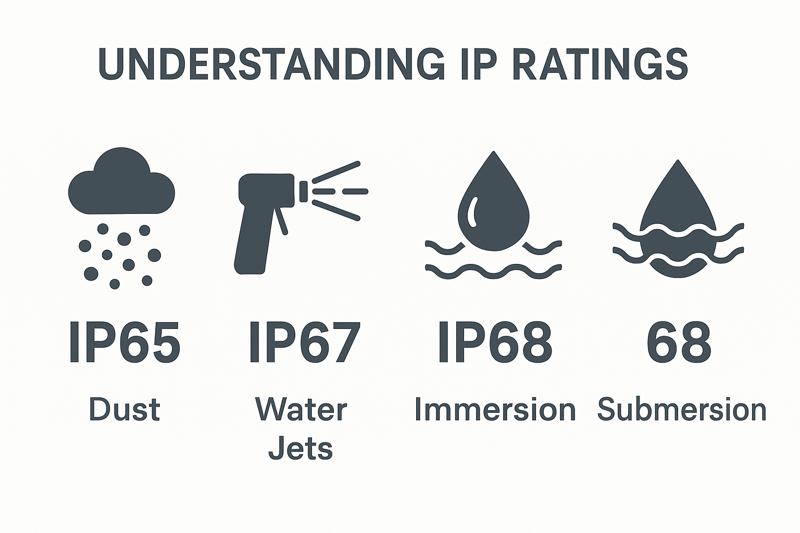
The most important thing for an installer to understand is that the liquid protection rating (the second number) isn’t just a scale of "good, better, best." It relates to very specific test conditions. For example, the test for an IP67 rating involves immersing the product in 1 meter of water for 30 minutes. The test for IP68 is more severe—continuous submersion at a depth specified by the manufacturer. This means an IP67 strip is designed to survive a temporary flood in a garden, but it is not designed to live permanently underwater in a swimming pool. Using it that way will cause it to fail. When you explain this level of detail to your client, Tom, it shows you are a true professional who protects their investment by selecting the right product for the exact environment, not just one that is "close enough."
Decoding the Numbers: A Practical Guide
Let’s break down the ratings you will encounter most often. The first digit is almost always ‘6’ for quality LED strips, which means "Totally Dust Tight." The second digit is what we need to focus on.
| IP Rating | Second Digit Meaning | Typical Test Condition | Best Applications |
|---|---|---|---|
| IP65 | Water Jets | Protected against low-pressure water jets from any direction. | Indoor wet areas (bathrooms, under cabinets), soffits, covered patios. Places that get splashed, not submerged. |
| IP671 | Temporary Immersion | Protected when immersed in water up to 1 meter deep for 30 minutes. | Landscape lighting, deck lighting, irrigation areas. Anywhere it might sit in a puddle or be temporarily flooded. |
| IP682 | Continuous Submersion | Protected during continuous immersion in water deeper than 1 meter. | Fountains, swimming pools, ponds, boat docks. Anywhere the light will be underwater permanently. |
Key Takeaway for Installers:
- IP65 for Splashes: Use this for areas that get wet but where water won’t pool. Think of it as "weather-resistant." A classic example is under the eaves of a house.
- IP67 for In-Ground: This is your go-to for landscape path lighting or deck lighting where the strip might end up in standing water after heavy rain.
- IP68 for Underwater: This is the only rating suitable for any application where the light will be constantly underwater. There is no substitute. Using a lower-rated product is a guaranteed failure.
Why Do Some "Waterproof" Strips Yellow and Crack?
You did everything right. You chose the correct IP rating for the job. But a year later, the strip looks terrible. It’s discolored, brittle, and the light output has faded. The client is asking why the expensive lighting you installed didn’t even last a year.
The cause is the waterproofing material itself. Cheap strips use epoxy resin or a hollow PVC/silicone tube. When exposed to sunlight (UV radiation), these materials chemically break down, leading to yellowing, hardening, and cracking. Professional-grade strips use solid, UV-stable silicone extrusion.
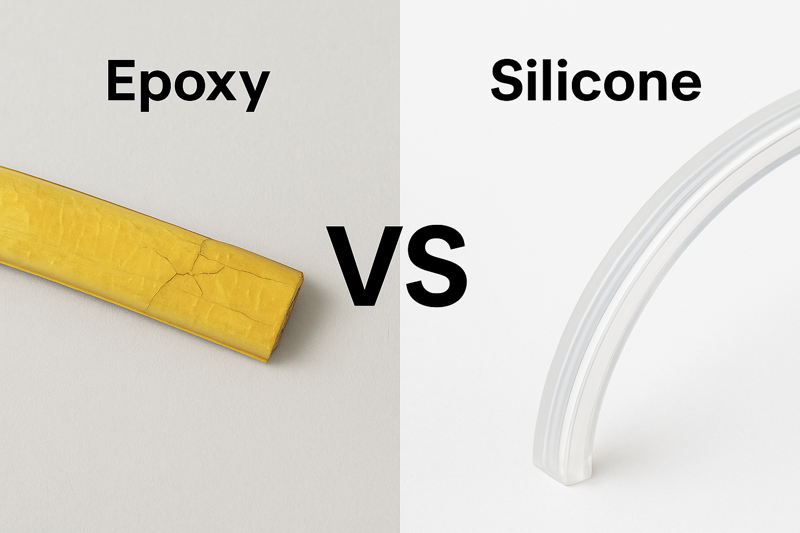
This is the most important secret in our industry, and it’s where manufacturers like us, Rhlite, build our reputation. Making a strip IP67 rated for a 30-minute lab test is easy. Making a strip that can survive years of real-world outdoor exposure is hard. It requires better materials. Epoxy resin is cheap and easy to apply, so many low-cost factories use it. It looks great out of the box, but it has zero UV stability. The sun’s rays literally cook it. A hollow silicone sleeve is a step up, but it traps air, which holds heat and moisture, causing the strip inside to fail prematurely. A solid silicone extrusion, where the silicone is molded directly around the PCB, offers the best protection. It has no air gaps, transfers heat efficiently, and most importantly, high-grade silicone is inherently UV-stable. It won’t yellow or crack. For Tom, asking a potential supplier "What material do you use for waterproofing?" is a more important question than "What is the IP rating?".
The Material Matrix: What Your Strips are Made Of
Let’s compare the three common waterproofing methods. This knowledge will protect you from product failures.
| Method | Description | Pros | Cons |
|---|---|---|---|
| 1. Epoxy Resin Coating3 | A clear, hard resin is poured over the top of a standard LED strip. | Very cheap to manufacture. | Terrible for outdoors. No UV stability (yellows/cracks), traps heat, impossible to repair. |
| 2. Hollow Silicone Tube/Sleeve | A standard strip is slid inside a hollow tube or sleeve made of silicone or PVC. | Relatively inexpensive, easy to produce. | Traps air, which acts as an insulator and holds moisture. Prone to condensation. PVC versions will yellow. |
| 3. Solid Silicone Extrusion4 | The strip’s PCB is fed through a machine that molds solid, high-grade silicone directly around it. | The Professional Standard. Excellent durability, UV-stable, great heat dissipation, truly seamless and waterproof. | Higher manufacturing cost. |
When you are quoting a project, explaining this difference to your client justifies the higher cost of a quality product. You can say: "We can use a cheaper, epoxy-coated strip, but based on my experience, it will likely fail within a year due to sun damage. I recommend this solid silicone product because it’s designed to last, saving you the cost and headache of replacing it." This positions you as a trusted advisor, not just an installer.
How Do You Power and Connect Waterproof Strips Without Causing Leaks?
You’ve sourced the perfect IP68 silicone strip. But the project requires you to cut it and make connections in the field. Every cut you make is a potential failure point where water can get in and destroy the entire run.
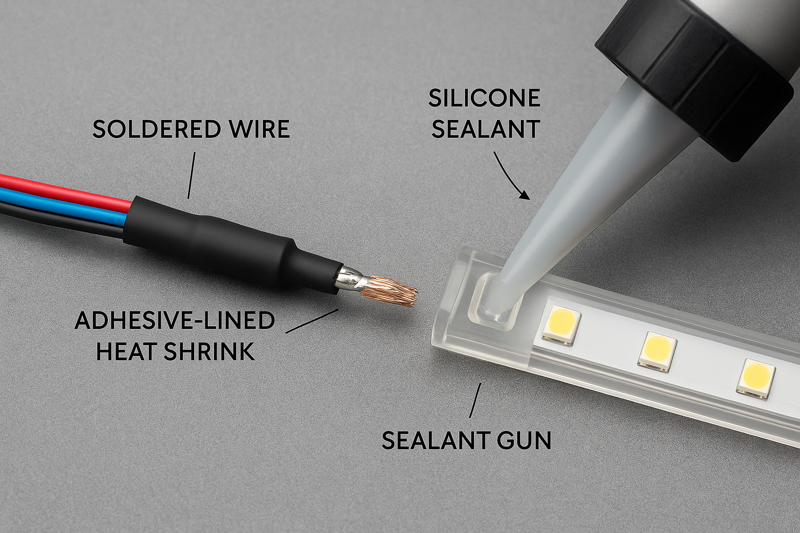
To maintain the waterproof rating, you must use purpose-built connectors and sealants. Field connections should be made using solder, then sealed with adhesive-lined heat shrink and finally injected with marine-grade, non-corrosive silicone for a permanent, watertight seal.
One of the biggest mistakes I see is installers relying on simple, solderless clamp connectors for outdoor work. These are great for indoor, dry applications, but they are not reliable in a wet environment. Vibration and temperature changes can cause them to loosen, and they offer no protection against moisture. A proper, soldered connection is always superior. Then, the seal is everything. We supply our professional clients with kits that include end caps and a special, electronics-grade RTV silicone. The process is simple: solder the wires, slide the end cap over the connection, and then completely fill the end cap with the silicone. As it cures, it creates a flexible, 100% waterproof block that protects the connection permanently. It’s an extra step, but it’s the only way to guarantee a field connection will last.
The Field Connection Blueprint
Here is a reliable, step-by-step process for making durable, waterproof connections5 on-site.
- Plan your Cuts: Before installation, lay out your strips and plan your runs to minimize the number of cuts you need to make. The fewer connections you have in the field, the better. Whenever possible, order custom lengths from the factory with the power leads pre-sealed.
- Make a Clean Cut: Use a sharp utility knife or scissors to cut the strip only on the designated cut line.
- Prepare the Surface: You will need to carefully remove a small amount of the silicone from the top of the copper connection pads. Use a small blade to gently scrape it away. Be careful not to damage the PCB.
- Solder Your Leads: Pre-tin both the copper pads on the strip and the ends of your low-voltage wire. Solder the wires to the pads, ensuring a strong, clean connection.
- Seal the Connection:
- Step A (The Inner Seal): Place a piece of adhesive-lined (dual-wall) heat shrink over the soldered joint. When heated, this type of heat shrink not only shrinks but also melts an inner lining of glue, creating the first layer of water resistance.
- Step B (The Outer Shell): Place a silicone end cap over the entire connection.
- Step C (The Final Seal): Completely fill the end cap with a neutral-cure, marine-grade silicone sealant6. This is critical. Do not use acidic cure silicone (it smells like vinegar), as it can corrode the electronics over time. Push the nozzle of the tube deep into the cap to ensure there are no air bubbles.
Following this three-layer sealing method (solder, adhesive heat shrink, silicone-filled cap) will create a connection that is just as robust as the factory-sealed end.
Conclusion
Success with waterproof lighting is in the details. By understanding the true meaning of IP ratings, insisting on high-quality materials like solid silicone, and using professional connection methods, you can install lighting systems that will perform flawlessly for years, in any weather.
-
Understanding IP67 is crucial for selecting the right LED lights for outdoor and wet environments, ensuring durability and safety. ↩
-
Exploring IP68 applications helps you choose the right lighting for underwater settings, ensuring longevity and performance. ↩
-
Learn about the limitations of Epoxy Resin Coating, especially for outdoor applications, to make informed decisions. ↩
-
Explore this link to understand why Solid Silicone Extrusion is considered the professional standard for durability and waterproofing. ↩
-
Explore this link to discover advanced techniques and tips for ensuring your connections remain waterproof and durable. ↩
-
Learn about marine-grade silicone sealant to understand its advantages for waterproofing and protecting your connections. ↩


