Underestimating the budget on a large lighting project can turn a potential success into a financial nightmare. A simple cost-per-meter calculation for the LED strip is a recipe for disaster.
Accurately budgeting for large outdoor LED projects requires a comprehensive approach: a detailed Material Takeoff (MTO) for all system components and a realistic estimate of installation labor based on project complexity and site conditions.
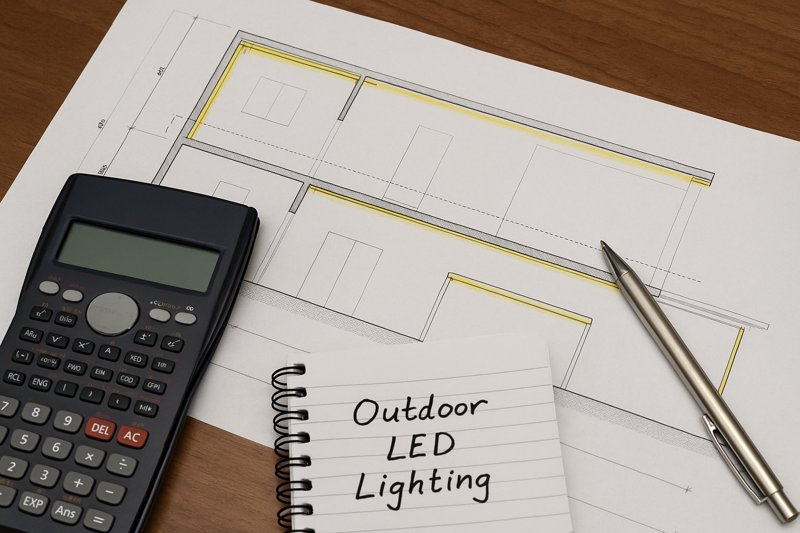
As a factory owner providing complete LED strip solutions, I have seen many project budgets succeed or fail based on their initial planning. For a buyer like Tom, who manages large-scale architectural and lighting projects in the US, getting the budget right from the start is non-negotiable. It protects his profit margins and his reputation. Let’s break down how the pros build a reliable budget.
How Do You Calculate the Total Material Cost Accurately?
You found a great price per meter on an LED strip, but what about everything else needed to make it work? The hidden costs of power supplies, channels, and connectors can quickly surprise you.
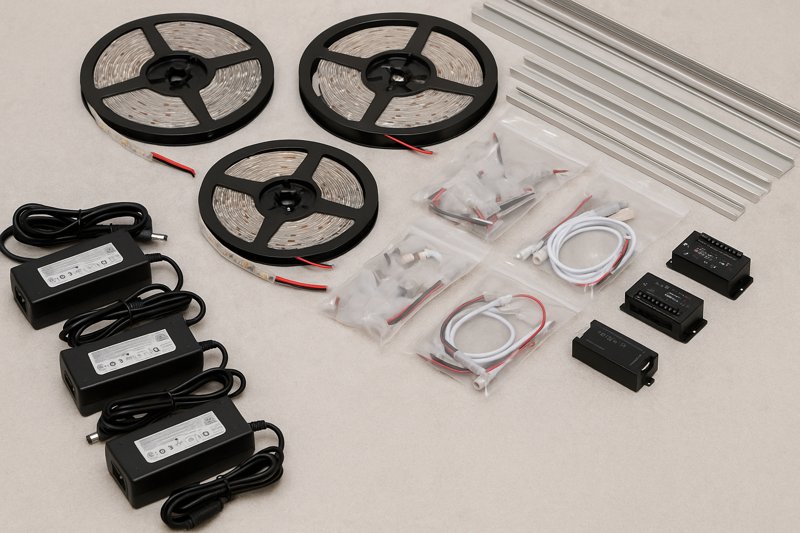
To calculate material costs, create a detailed Material Takeoff (MTO) sheet. This must include the total length of LED strips plus waste, the correct number and wattage of power supplies, all controllers and wiring, and every piece of mounting hardware.
Failing to account for every single component is the most common budgeting error I see. A reliable factory partner should help you build this list. For large projects, this detailed approach is the only way to get a true picture of your material expenses before you commit.
Building Your Material Takeoff (MTO)
An MTO is simply a detailed list of all materials needed for a project.
- LED Strips1: Start with the total linear meters required from your plans. Then, add a waste factor of 5-10%. This buffer is crucial to account for cuts, test pieces, and any potential damage during handling. The quality tier (e.g., mid-range vs. high-end) will be the biggest driver of this line item’s cost.
- Power Supplies2: This is critical. First, calculate the total wattage of your LED strips (strip wattage per meter x total meters). Then, apply the 80% rule: your total load should not exceed 80% of the power supply’s rated capacity. This means you will need more power supply capacity than your strip’s total wattage. For large projects, this often means multiple high-wattage power supplies.
- Controllers & Wiring: For RGB or tunable white systems, you need controllers. For very long runs, you’ll also need signal amplifiers to prevent signal degradation. Don’t forget the cost of the main low-voltage wiring running from the power supplies to the strips.
- Mounting Hardware3: This includes aluminum channels for heat dissipation, diffusers for the channels, end caps, and mounting clips. For a project with hundreds of meters of lighting, these small costs add up fast.
Here is a simple MTO structure:
| Material Component | Calculation Basis | Estimated Quantity |
|---|---|---|
| IP67 LED Strip | (Total Length from Plan x 1.05) | e.g., 525 meters |
| Power Supply (320W) | (Total Strip Wattage / 0.8) / 320W | e.g., 10 units |
| Controller/Amplifier | Based on control zones and run lengths | e.g., 8 units |
| Aluminum Channel | Total Length from Plan | e.g., 500 meters |
| Waterproof Connector | Number of connections needed | e.g., 100 pieces |
This systematic approach prevents surprises and forms the foundation of a solid budget.
What Factors Determine the Cost of Installation Labor?
The materials are on site, but the job is only half done. Why can installation costs for two similar-sized projects be so different?
Installation labor costs are driven by project complexity and site conditions. Key factors include accessibility, surface preparation needs, the complexity of wiring and controls, and the local hourly rate for qualified electricians.

Labor is often the biggest variable in a project budget. A thorough site survey before finalizing the budget is essential. Understanding these factors allows a project manager like Tom to estimate hours more accurately and explain to his clients why one installation may cost more than another.
Deconstructing Labor Expenses
Let’s look at the main drivers of labor time and cost.
- Site Accessibility4: Is the installation at ground level along a pathway, or is it 30 meters up on a building facade? Working at height requires expensive equipment like scissor lifts or scaffolding and specialized safety protocols. This can easily double the labor hours compared to a simple ground-level job.
- Surface Preparation5: Mounting strips to a clean, smooth metal surface is fast. Having to drill into reinforced concrete, chase channels into plaster, or clean and prime dirty surfaces adds significant time and cost to the project.
- Wiring & Control System Complexity6: A simple single-color, on/off system is straightforward. A multi-zone DMX-controlled RGBW system requires a technician with programming skills. They need to run data cables, connect controllers, address each fixture, and program the lighting scenes. This is a highly skilled task that commands a higher hourly rate and more hours.
- Testing and Commissioning: A professional job doesn’t end when the last strip is in place. The budget must include time for the installation team to test every segment, troubleshoot connections, and ensure the control system works as designed. For a large project, this can take a full day or more.
A simple project might take 10 minutes per meter to install, while a complex one could take over an hour per meter. This variation highlights why a site survey is not optional for accurate budgeting.
Why is a Contingency Fund Essential for Large Projects?
Your budget is calculated to the dollar, and every material and labor hour is accounted for. What happens when the real world intervenes?
A contingency fund, typically 10% to 15% of the total projected cost, is a mandatory financial buffer. It is not for "extras" but is reserved to cover unforeseen but realistic problems like material damage, unexpected site issues, or minor scope changes.
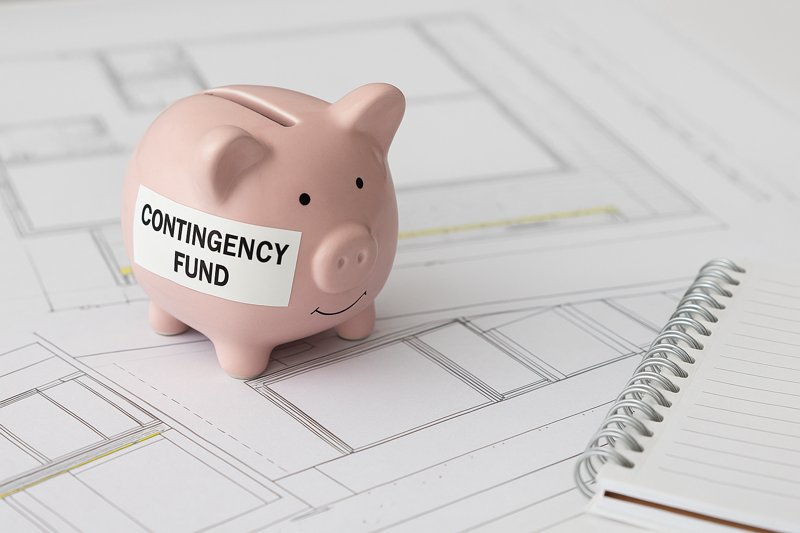
Including a contingency fund is a sign of a seasoned professional, not a poor planner. For a buyer like Tom, it’s a critical tool for risk management. It prevents him from having to go back to a client for more money for small issues or, even worse, having to cover unexpected costs out of his own profit margin. It addresses the very real pain that projects rarely go exactly as planned.
Planning for the Unplanned
A contingency budget7 is a proactive strategy to handle common project challenges.
- What It Covers:
- Unexpected Site Conditions: The crew might discover that a wall thought to be drywall is actually concrete block, requiring different tools and more time. Or a supposed waterproof surface needs additional sealing.
- Minor Scope Creep: The client sees the lights being installed and asks, "Can we just add another short section over there?" The contingency fund can cover this without having to re-negotiate the entire contract.
- Material Issues: A reel of LED strip might get damaged in transit or on site. The contingency allows for a quick replacement without derailing the project timeline or budget.
- Logistical Problems: An unexpected delay might require paying for expedited shipping for a component to keep the project on schedule.
- How to Calculate It: For standard projects, 10% is a good starting point. For more complex or high-risk projects (e.g., renovations of old buildings, very harsh environments), 15% or even 20% might be more prudent.
- How to Use It: It should be tracked carefully. It is used to solve problems that threaten the project’s schedule or quality. It is not a slush fund for upgrades that were not in the original scope. Any unused contingency is extra profit at the end of the job.
Building this buffer into the initial quote shows foresight and protects the profitability of the project from the very beginning.
How Does a Factory Partnership Simplify Project Budgeting?
You’re trying to get quotes for strips from one supplier, power supplies from another, and channels from a third. This is slow, inefficient, and risky.
A one-station factory partnership simplifies budgeting by providing a single, comprehensive quote for a fully tested and compatible system. This reduces communication overhead, eliminates component mismatches, and gives you a reliable set of technical data to build your budget on.

This directly addresses the pain points of inefficient communication and unreliable suppliers. When Tom works with Rhlite, he’s not just buying a product; he’s sourcing a complete, verified solution. This partnership approach de-risks the entire procurement and planning phase of his project.
The Strategic Advantage of a Single Source
Working with a single, reliable factory partner provides tangible benefits for large-scale budgeting.
- Guaranteed Compatibility8: We ensure the LED strip’s wattage matches the power supply’s capacity (with the 80% rule applied). We confirm the controller is correct for the strip type. We verify that the strip fits perfectly into the specified aluminum channel. This eliminates the huge risk and cost of discovering on-site that components from different suppliers don’t work together.
- Accurate Technical Data9: Our product specifications, like wattage per meter, are tested and reliable. When you use our data to calculate your power supply needs, you know it’s accurate. This prevents under-powering your system or over-spending on excessive power capacity. This builds the trust that is so often broken by suppliers who falsify data.
- Streamlined Quoting10: Instead of managing three or four different conversations and quotes, you have one point of contact. This saves Tom valuable time and makes the budgeting process faster and less prone to error.
- Volume Pricing and Logistics: By consolidating the entire material order with one factory, you are in a better position to negotiate volume pricing. Furthermore, we can consolidate the entire shipment, simplifying logistics and potentially reducing shipping costs.
I recently worked with a contractor who was trying to budget a large facade project. His initial MTO, sourced from three different vendors, had undersized power supplies and incompatible connectors. We provided a revised, one-station solution quote that, while slightly different in price, guaranteed a working system and saved him from what would have been a costly and embarrassing installation failure.
Conclusion
Budgeting for large outdoor LED projects is a game of details. A thorough material takeoff, a realistic labor estimate, a smart contingency fund, and a reliable factory partner are the four pillars of a successful and profitable installation.
-
Accurate calculations for LED strips are vital for project success. Learn effective methods to ensure you order the right amount. ↩
-
Understanding power supply requirements is crucial for ensuring your LED strips function efficiently and safely. Explore this link for expert insights. ↩
-
Choosing the right mounting hardware is essential for durability and performance of your LED installations. Discover the best options available. ↩
-
Understanding site accessibility can help you budget accurately and avoid unexpected labor costs in your projects. ↩
-
Exploring surface preparation techniques can lead to more efficient project planning and cost management. ↩
-
Learning about wiring complexities can help you allocate the right resources and skills for your projects, ensuring success. ↩
-
Understanding a contingency budget is crucial for effective project management and financial planning. Explore this resource to enhance your knowledge. ↩
-
Explore how guaranteed compatibility can save costs and prevent installation issues in LED strip lighting projects. ↩
-
Understanding the importance of accurate technical data can help you avoid costly mistakes in your LED lighting projects. ↩
-
Discover how streamlined quoting can enhance efficiency and reduce errors in your budgeting process. ↩


