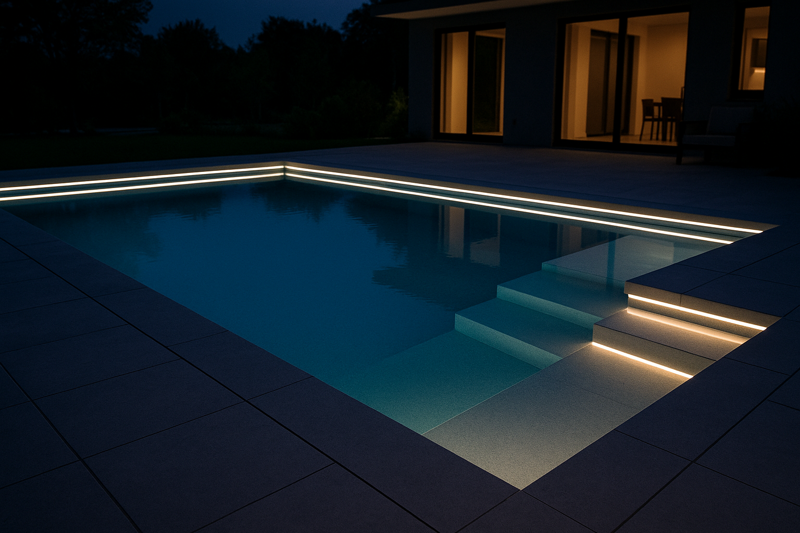
Your client has a magnificent new pool, a masterpiece of design. But at night, a single, harsh underwater light turns it into a glaring blue blob, destroying the sophisticated atmosphere you worked so hard to create.
For stunning pool lighting, you must use a certified IP68-rated, low-voltage (12V/24V) LED strip specifically designed for continuous submersion. Proper installation inside a channel with marine-grade sealed connections is critical for both safety and longevity.
I speak with contractors and designers like Tom all the time who want to create that resort-style pool glow. They know the potential is there, but they are rightfully concerned about safety and durability. As a factory owner, I can tell you that success isn’t just about the strip itself; it’s about understanding the entire system, from the materials to the installation method. Let’s dive into the critical details.
What Makes an LED Strip Truly "Pool-Safe"?
You see "waterproof" on a product description and think it’s good enough for a pool. After one season, it fails due to water intrusion or the casing turns yellow from chlorine, leading to an angry client and a costly replacement job.
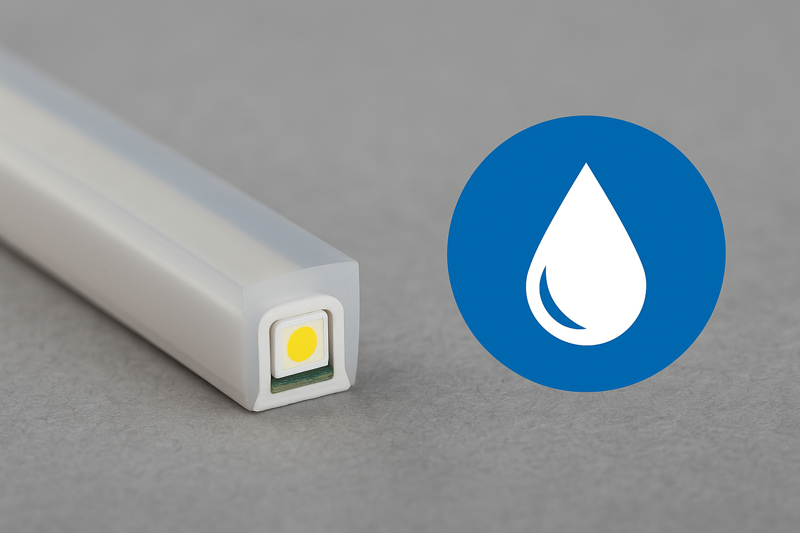
A "pool-safe" LED strip must have three things: a genuine IP68 waterproof rating, a casing material resistant to pool chemicals like chlorine, and be part of a certified low-voltage electrical system. Anything less is a serious risk.
This is the most important part of the entire discussion. The difference between a strip for a garden path (IP67) and one for a pool (IP68) is huge. One is designed to resist rain; the other is built for a life underwater. For a buyer sourcing from overseas, this is where you must be vigilant about specifications and certifications.
The Non-Negotiable Safety Features
Let’s break down the technical details that separate a true submersible strip from a simple outdoor one.
The IP68 Rating Isn’t a Suggestion
The IP code rates protection against solids (first digit) and liquids (second digit). IP67 means protection against temporary immersion (up to 1 meter for 30 minutes). IP68 means it is protected against continuous, long-term immersion under pressure. This is the only rating acceptable for use inside a pool. Asking for the third-party test report for this rating is a key part of quality control, protecting you from falsified certificates.
Material Matters: Fighting Chlorine
Standard PVC or epoxy-filled strips will degrade, yellow, and become brittle when exposed to chlorinated water. You must specify a strip encapsulated in high-grade, anti-chlorine silicone1 or polyurethane (PU). These materials maintain their clarity and flexibility, ensuring the light remains consistent and the waterproofing intact for years.
The Low-Voltage System
Safety is paramount. Never use high-voltage lighting inside a pool. All underwater lighting must be low voltage (typically 12V or 24V DC). This requires a transformer, known as a power supply or driver, to be installed in a dry, accessible location far away from the pool shell itself.
| Feature | Why It’s Critical for Pools | What to Ask a Supplier |
|---|---|---|
| IP68 Rating | Ensures protection against continuous water pressure. | "Can you provide the third-party IP682 test report?" |
| Chlorine Resistance | Prevents the strip from yellowing, cracking, and failing. | "What material is the casing? Is it anti-chlorine silicone?" |
| Low Voltage (12/24V)3 | The primary electrical safety feature to prevent shock. | "Is this strip part of a complete, certified low-voltage system?" |
Where Are the Best Places to Install Strips in a Pool?
Your design includes a stunning infinity edge and a built-in tanning ledge. But how do you light these custom features effectively without cluttering the pool with bulky fixtures? You want the light to feel like it’s part of the pool’s architecture.
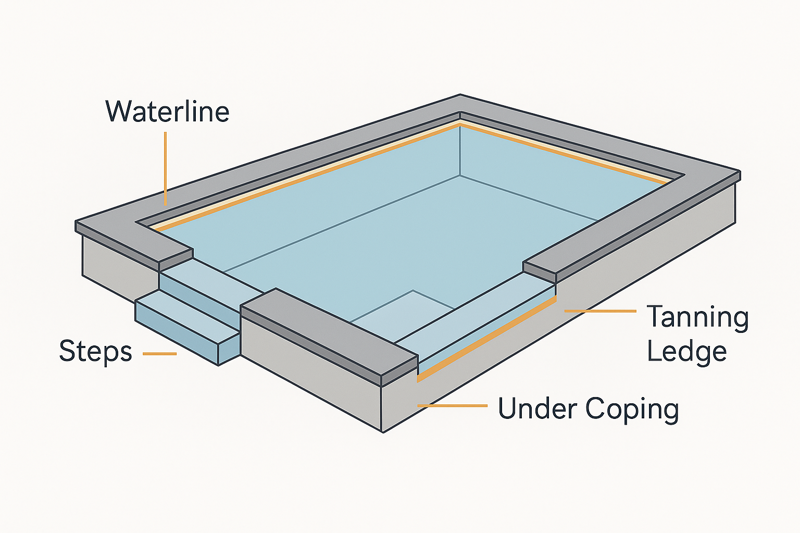
The best applications integrate light seamlessly. Install strips along the waterline for perimeter lighting, under the coping for a hidden glow, on stair treads for safety and style, and beneath the surface of tanning ledges to define different zones.
This is where you move from function to art. By tracing the unique lines of your pool design, you guide the eye and create a custom nighttime identity for the space. For an architect or designer, this is how you make a project truly unique and justify a higher value to the end client.
Architectural Pool Lighting Techniques
Let’s explore the most impactful placement strategies.
Waterline Perimeter Lighting4
Placing a continuous strip a few inches below the waterline along the pool’s perimeter is the most popular high-end application. It creates a stunning ribbon of light that perfectly outlines the pool’s shape, whether it’s a simple rectangle or a freeform curve. It makes the body of water glow as a single, cohesive element.
Under-Coping Illumination5
For a more subtle effect, installing the strip directly under the pool’s coping (the capstone edge) casts a gentle wash of light down the wall and into the water. This hides the light source completely, creating a soft, indirect glow that is very sophisticated and glare-free.
Step and Ledge Definition6
Safety and style go hand-in-hand here. Placing strips under the lip of each step not only makes them clearly visible at night but also creates a beautiful cascading light effect. The same technique on a submerged tanning ledge or bench clearly defines it as a separate, shallow zone.
| Installation Location | Primary Effect | Design Tip |
|---|---|---|
| Waterline Perimeter | Outlines pool shape, creates a strong visual. | Use a diffused channel for a flawless, dot-free line. |
| Under Coping | Subtle, indirect glow, hides light source. | Angle the channel slightly inward to direct light. |
| Steps & Ledges | Enhances safety and creates depth. | A lower brightness is often more effective here. |
How Do You Ensure a Flawless and Long-Lasting Installation?
You’ve selected the perfect IP68 strip, but the installer simply glues it to the pool wall. It looks wavy, and the first connection point fails within months, causing a section of the strip to go dark and requiring the pool to be drained for repair.
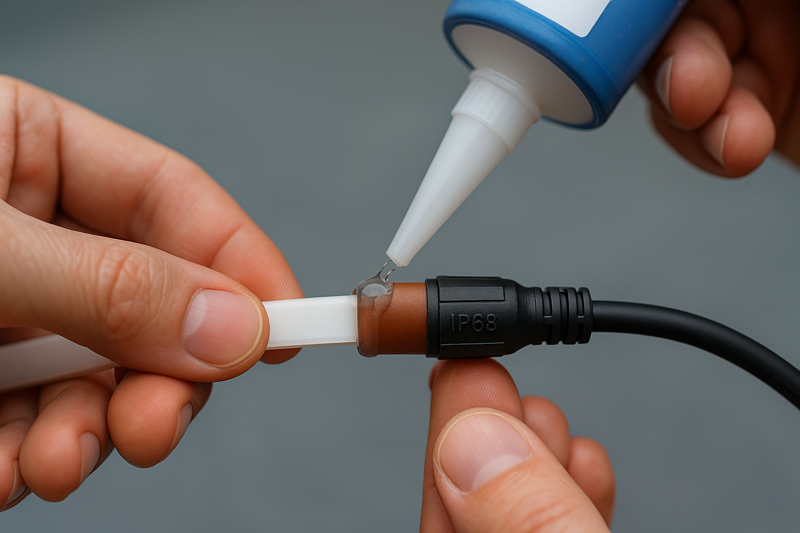
A professional installation is mandatory. The strip must be secured in a dedicated mounting channel designed for pools. All connections must be made outside the pool or use specialized IP68 connectors, with every joint sealed perfectly with marine-grade sealant.
As a manufacturer, I can make the best IP68 strip in the world, but a poor installation will cause it to fail. The system is only as strong as its weakest link, which is almost always the connection point. This is a crucial detail for any contractor to oversee.
Installation Best Practices
Doing it right the first time prevents draining the pool later.
The Critical Role of Channels
Never adhere a strip directly to a pool surface. Use a purpose-built channel made from aluminum or PVC. The channel ensures the strip is perfectly straight, protects it from being snagged, and helps dissipate a small amount of heat. For a professional look, the channel should be recessed into the pool wall during construction.
Waterproofing Every Connection
This is where failures happen. The wire lead from the LED strip must be connected to the main low-voltage cable. This connection must be 100% waterproof. This can be achieved by using factory-molded IP68 connectors7 or a painstaking process of soldering, heat-shrinking with adhesive-lined tubing, and potting the entire connection in a waterproof junction box8 filled with two-part epoxy or silicone.
Planning Cable Runs
The cable from the strip to the above-ground power supply must be run through a proper conduit9. This conduit should be planned during the pool’s construction phase to ensure it’s hidden and protected.
| Installation Step | Critical Purpose | Consequence of Failure |
|---|---|---|
| Using Channels | Protection, straight lines, professional look. | Wavy lines, strip damage, unprofessional appearance. |
| Sealing Connections | Preventing water from reaching the electronics. | System failure, short circuits, costly repairs. |
| Using Conduit | Protecting the low-voltage cable from damage. | Cable damage, potential for entire system replacement. |
How Do You Power and Control Underwater LED Strips Correctly?
The pool lights are installed, but turning them on and off requires flipping a breaker in a utility shed. The client wants to dim the lights for a relaxing evening or change colors for a party, but the system wasn’t designed for it.
Use a high-quality, outdoor-rated (IP65+) power supply correctly sized for the total wattage of your strips. Pair it with a compatible control system—from a simple switch to a sophisticated DMX controller for full color and zone control.
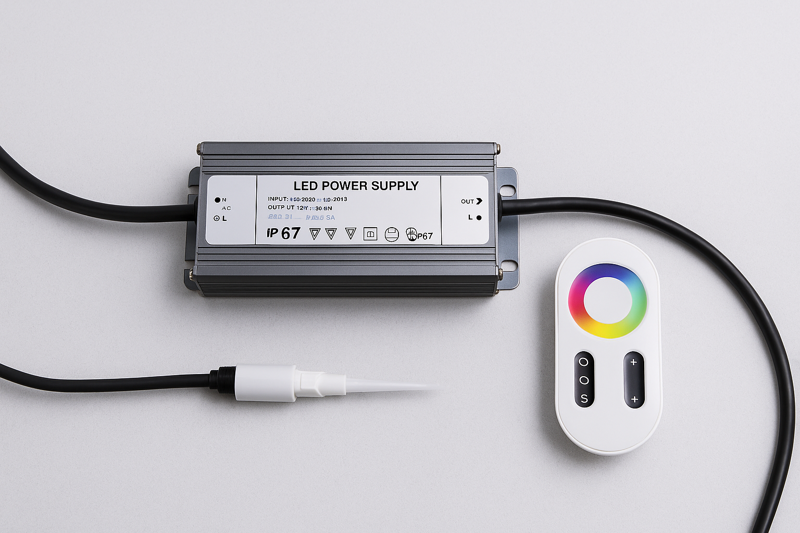
The lighting effect is only half the story; the user experience is the other half. Providing intuitive and flexible control is what makes a lighting installation truly feel luxurious. This is a key part of providing a complete solution, from the strip in the water to the switch in hand.
The Brains of the Operation
Let’s look at the components that bring the light to life.
Selecting the Right Power Supply
Calculate the total wattage of your LED strips (watts per meter x total meters). Choose a power supply with a capacity at least 20% higher than this total to ensure it runs cool and lasts long. It must be a certified Class 2 power supply for safety, and its location must be dry, ventilated, and compliant with all local electrical codes.
Choosing Your Control Method
The options range from simple to complex. A basic setup uses a simple on/off switch. For more elegance, a dimmable system with a waterproof remote allows for mood setting. For the ultimate effect, an RGB (Red, Green, Blue) or RGBW (RGB + White) strip connected to a DMX or wireless controller allows for any color imaginable, dynamic color-changing scenes, and even syncing with music for parties. This is how you provide a truly customized experience.
| Control System | Best Use Case | Complexity & Cost |
|---|---|---|
| On/Off Switch | Simple, functional, budget-conscious. | Low |
| Dimming | Creating different moods (relaxing vs. bright). | Low to Medium |
| RGB/RGBW | Full color control for parties and themes. | Medium to High |
| DMX Control | Professional zone control, custom scenes. | High |
Conclusion
Successfully lighting a pool with LED strips hinges on a system of quality: certified IP68 products, chemical-resistant materials, professional installation, and user-friendly control. Get these details right, and you can create breathtaking, safe, and durable designs.
-
Discover how anti-chlorine silicone can enhance the longevity and performance of your pool lighting. This resource will provide valuable insights. ↩
-
Understanding the IP68 rating is crucial for ensuring safety and durability in underwater lighting. Explore this link to learn more. ↩
-
Learn why low voltage is essential for safety in underwater lighting systems, ensuring a safe swimming environment. This link offers detailed information. ↩
-
Discover how Waterline Perimeter Lighting enhances pool aesthetics and safety, creating a stunning visual effect. ↩
-
Learn about the subtle elegance of Under-Coping Illumination and how it can transform your pool experience. ↩
-
Explore the dual benefits of safety and style with Step and Ledge Definition, ensuring a beautiful and safe pool environment. ↩
-
Explore this link to understand the importance of IP68 connectors in ensuring waterproof connections for LED strips, preventing failures. ↩
-
Discover how waterproof junction boxes can safeguard your electrical connections and enhance the longevity of your installation. ↩
-
Learn about the significance of using proper conduit for cable runs to protect your installation and avoid costly repairs. ↩


