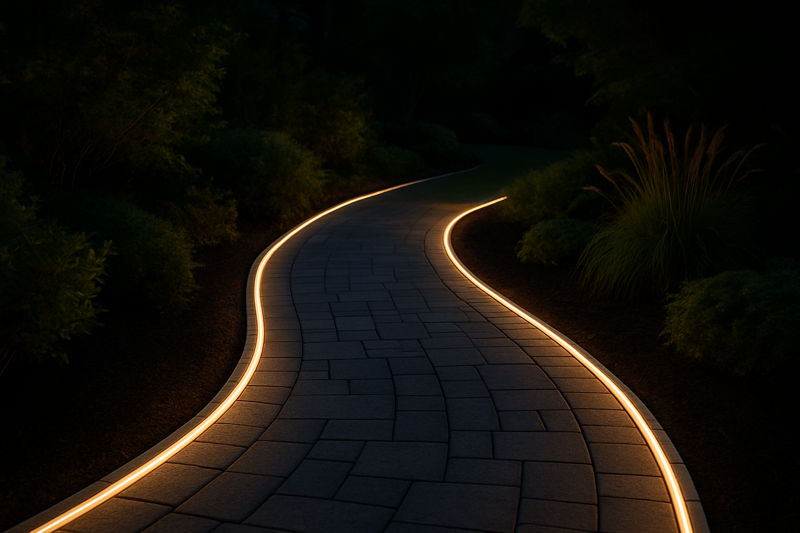
A dark, winding garden path is a tripping hazard at night. But a line of cheap solar stakes looks tacky, and harsh spotlights create blinding glare that ruins the very atmosphere you want people to enjoy.
Achieve the perfect balance by integrating low-voltage, IP67-rated LED strips into the landscape itself. This creates soft, indirect light that guides the way safely while enhancing the path’s texture and the beauty of the surrounding garden.
As a manufacturer of LED solutions, I’ve seen designers and contractors struggle with this balance. They know that lighting is not just about visibility; it’s about experience. The most successful projects don’t just add light to a path; they make the path itself glow. Let’s explore the key decisions to achieve this seamless and sophisticated effect.
How Do You Choose the Right LED Strip for an Outdoor Path?
You’re scrolling through supplier websites, and every LED strip is labeled "waterproof." Some are cheap, some are expensive, but how do you know which one will actually survive more than one winter without cracking or failing?
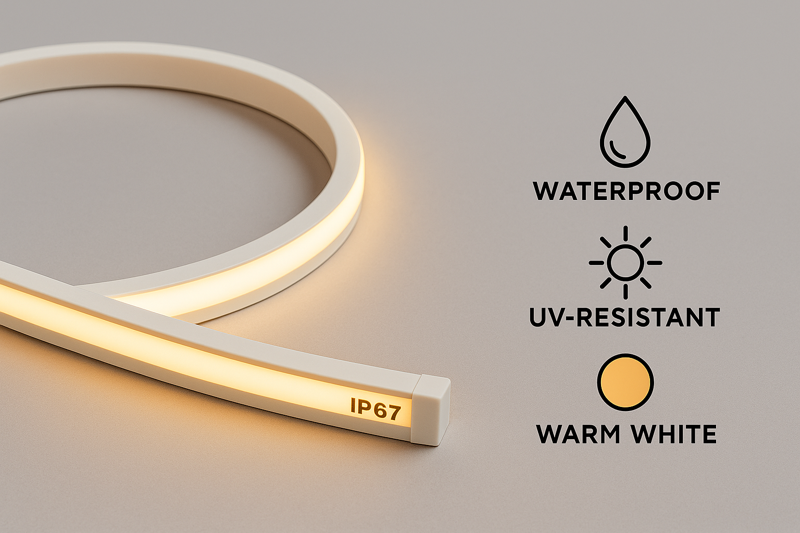
For outdoor paths, prioritize a certified IP67 rating for water resistance, a UV-resistant silicone casing to prevent yellowing, an appropriate lumen output for guidance not glare, and a warm color temperature (2700K-3000K) for a welcoming feel.
As a factory owner, I can tell you the spec sheet doesn’t always tell the whole story. The materials used in construction are just as important as the electronic components inside. Choosing the right product upfront saves you the massive headache and cost of replacing a failed installation that’s embedded in concrete or stone.
The Four Pillars of a Durable Path Light
Let’s break down the essential specifications that matter for longevity and performance in an outdoor environment.
IP Rating: The Weatherproof Standard
For pathways, you need protection against rain, sprinklers, and puddles—but not full submersion. An IP67-rated1 strip is perfect. It’s fully protected against dust and can withstand temporary immersion in water. Don’t pay extra for IP68 (submersible) unless the path is in a floodplain. But avoid IP65, which is only protected against jets of water and may not be sufficient for ground-level installations.
Material Science: UV Resistance is Key
The biggest enemy of outdoor plastic and silicone is the sun. Cheap PVC-coated strips will yellow, become brittle, and crack within a year or two of sun exposure. You must insist on high-grade, UV-stabilized silicone2 for the strip’s casing. This material remains flexible and clear, ensuring your lighting looks and performs as new for years.
Brightness (Lumens) and Color (CCT)
For pathways, less is often more. You want guidance, not an airport runway. A lower lumen output (typically 200-400 lumens per meter) is usually sufficient. For color, the Correlated Color Temperature (CCT) is critical for mood. A warm white (2700K to 3000K3) creates a welcoming, high-end residential feel. Cooler temperatures (4000K+) can appear institutional and stark.
| Specification | Recommendation for Paths | Why It Matters |
|---|---|---|
| IP Rating | IP67 | Protects against rain and puddles without overkill. |
| Casing Material | High-Grade UV-Resistant Silicone | Prevents yellowing and cracking from sun exposure. |
| Brightness | 200-400 Lumens / Meter | Provides safe guidance without causing harsh glare. |
| Color Temperature | 2700K – 3000K (Warm White) | Creates a cozy, welcoming, and sophisticated atmosphere. |
What’s the Best Way to Light Steps and Changes in Elevation?
A single missed step in the dark can lead to a serious fall. However, traditional, bulky step-light fixtures can be ugly, disrupt the hardscape design, and even become a trip hazard themselves during the day.
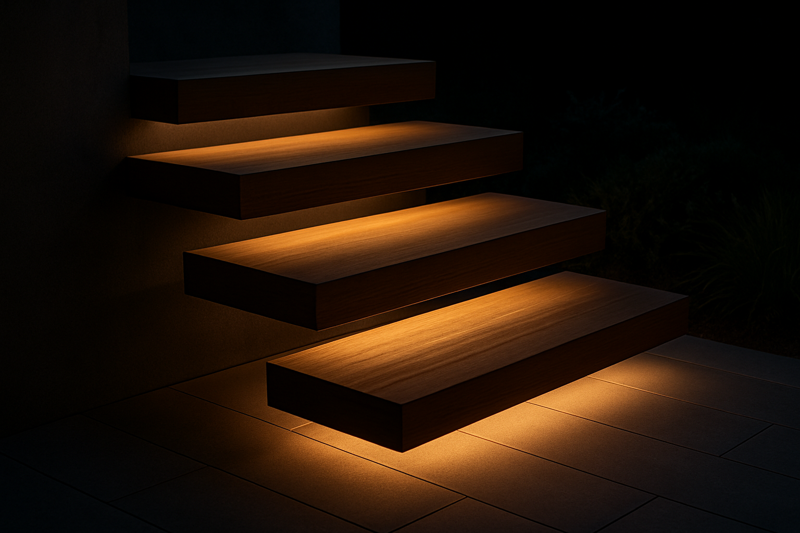
The safest and most elegant solution is to integrate the light source directly. By mounting a waterproof LED strip under the tread of each step, you illuminate the path below without any visible, glaring fixture.
This technique turns a critical safety feature into a stunning design element. It’s what I call "invisible lighting." For a professional like Tom, this is a signature touch that elevates a project from standard to spectacular. It tells the client you think about every detail, day and night.
Strategies for Vertical Changes
Making level changes obvious is your top priority, but the method you choose defines the style.
Under-Tread Illumination4
This is the most popular and effective method. You install an aluminum channel with an IP67 LED strip directly under the nose or lip of each step. This casts light downwards onto the step below, clearly defining the edge. The visual result is a beautiful "floating" effect, making heavy stone or concrete stairs feel weightless and modern. It’s pure, glare-free safety.
Side-Wall Wash5
For steps flanked by walls, you can mount a vertical strip or wash the steps with light from a strip hidden along the base of the wall. This technique highlights the texture of the risers and treads, creating a soft, sweeping light that guides people up or down.
Integrated Handrail Lighting6
For longer stairways or ramps, integrating an LED strip into the underside of the handrail is a superior solution. It delivers light exactly where it is needed along the entire path of travel, ensuring secure footing without adding any glare to the eyes. This is a high-end detail, perfect for projects focused on accessibility and modern design.
| Technique | Primary Benefit | Best For |
|---|---|---|
| Under-Tread Lighting | "Floating" Effect & Direct Step Safety | Modern designs, individual steps, stone or wood. |
| Side-Wall Wash | Soft Ambiance & Texture Highlighting | Paths with adjacent retaining or feature walls. |
| Handrail Integration | Continuous, Glare-Free Task Lighting | Long staircases, ramps, accessibility-focused designs. |
How Do You Define a Path’s Edge Without Creating Visual Clutter?
A meandering gravel or stone path can lose its edges completely in the dark, causing people to stray into flowerbeds. Yet, lining it with a row of stake lights often looks unnatural and cheap, like an airport runway.
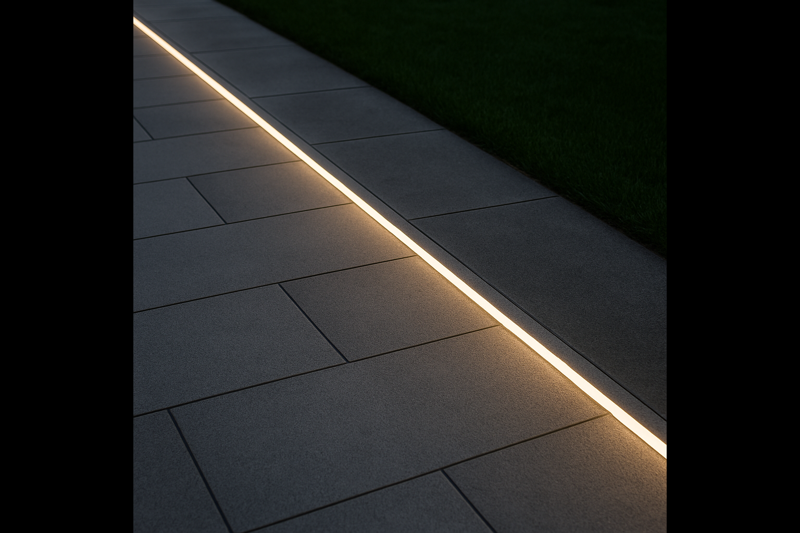
Create a clean, continuous line of light by embedding LED strips along the path’s border. Tuck them under paver edges or into dedicated landscape edging to provide a clear boundary that guides movement without distracting fixtures.
This approach is about subtlety and precision. You are using a "ribbon of light" to define a shape. It’s a modern, minimalist strategy that respects the natural forms of the garden. It tells the story of the path’s journey through the landscape, guiding the eye as well as the feet.
Techniques for Continuous Edging
The goal is to provide a gentle visual cue that defines the border of the path.
Under-Paver Installation7
For paths made of stone pavers or large flagstones, this is a fantastic hidden technique. During installation, a small channel is created, and the strip is mounted under the overhanging edge of the paver. The light spills out onto the ground next to the path, creating a soft, glowing outline. This requires planning but delivers a truly integrated look.
Dedicated Edging Channels
For a very crisp, modern aesthetic, use aluminum landscape edging8 that is designed to hold an LED strip. This creates a perfect, sharp line of light that works beautifully with gravel paths, turf, or modern concrete designs. The metal edging itself provides a clean daytime look, while the light provides the nighttime definition.
Illuminating Low Walls9
If the path runs alongside a low retaining wall or raised planter bed, you can mount the strip on the wall, aimed towards the path. This illuminates the walkway while also highlighting the texture of the wall material, doing double duty for safety and aesthetics.
| Edging Method | Visual Style | Best Path Material Match |
|---|---|---|
| Under Paver Edge | Soft, glowing, "hidden" light. | Flagstone, concrete pavers, natural stone. |
| In Edging Channel | Crisp, modern, linear. | Gravel, decomposed granite, modern pavers, turf. |
| Adjacent Wall Wash | Broad, textured, architectural. | Any path type running alongside a vertical surface. |
How Do You Create Atmosphere Instead of Just Functional Light?
You’ve made the path safe, but now it feels sterile—a brightly lit corridor through a dark space. A truly great lighting plan makes the journey along the path an experience, not just a commute from A to B.
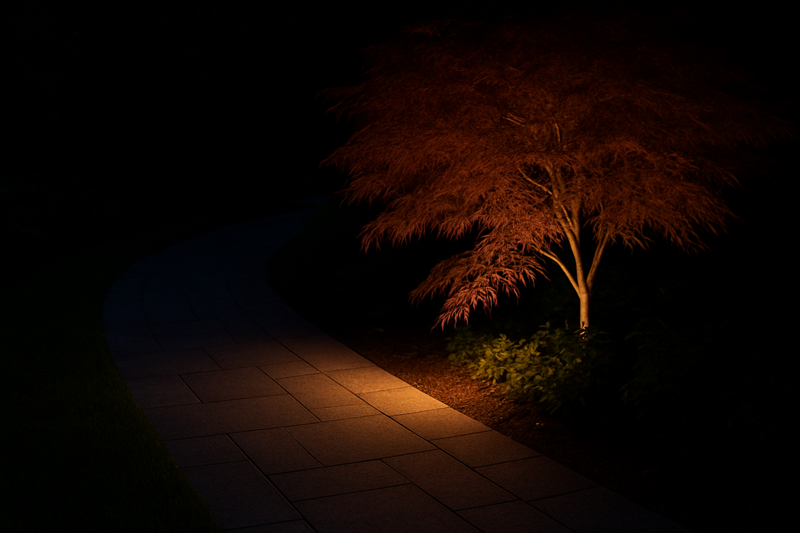
Use light to tell a story. Place small sections of LED strip strategically to uplight interesting trees, graze the texture of the path itself, or create gentle "pools of light" that encourage pauses and draw attention to key features.
This is where a designer’s eye becomes critical. It’s about thinking in layers. The path needs a base layer of safety lighting, but the magic comes from the accent layers. As a supplier, I provide the tools, but it’s the creative application that makes a project memorable. This approach—lighting the journey, not just the destination—is what separates a basic contractor from a sought-after designer.
Painting with Light
Think of the path as a gallery and use light to direct your guest’s attention.
Grazing Path Textures
For paths made of interesting materials like cobblestone, textured concrete, or old brick, use light to your advantage. By placing a strip very low and aiming it at a sharp angle across the surface, you create dramatic shadows that reveal all the rich texture. This "grazing" technique turns the path itself into a feature.
Highlighting Key Plants
Don’t just light the path, light what’s next to the path. Tuck a short, waterproof LED strip at the base of a beautiful ornamental grass, a sculptural shrub, or the trunk of a mature tree. This creates a dramatic silhouette and adds depth to the entire scene, making the garden feel larger and more mysterious.
Creating "Pools of Light"
A path doesn’t need to be evenly lit along its entire length. Allow for areas of relative darkness and light. Create a brighter "pool of light" around a bench, a sculpture, or a garden gate. This creates rhythm and pacing, encouraging people to slow down and appreciate specific views.
| Technique | Design Goal | Effect on Mood |
|---|---|---|
| Grazing Texture | To reveal the path’s surface character. | Dramatic, rustic, engaging. |
| Uplighting Plants | To create depth and highlight nature. | Mysterious, organic, elegant. |
| Pools of Light | To create rhythm and guide attention. | Deliberate, calming, gallery-like. |
Conclusion
A well-lit path is more than just safe. It’s a design statement that balances function with beauty, guiding guests on an immersive journey through the garden. By integrating light, you create a truly professional and stunning result.
-
Understanding IP67 ratings helps you choose the right outdoor lighting for durability and weather resistance. ↩
-
Explore how UV-stabilized silicone enhances the longevity and performance of outdoor lighting solutions. ↩
-
Learn why warm white lighting creates a welcoming atmosphere for outdoor spaces, enhancing aesthetics and safety. ↩
-
Explore the advantages of Under-Tread Illumination to enhance safety and aesthetics in stair design. ↩
-
Learn how Side-Wall Wash lighting can create a welcoming atmosphere while ensuring safety on stairways. ↩
-
Discover how Integrated Handrail Lighting enhances visibility and safety on long staircases and ramps. ↩
-
Learn about the Under-Paver Installation technique to create a seamless and integrated lighting effect for your pathways. ↩
-
Explore the advantages of aluminum landscape edging to enhance your outdoor lighting design and achieve a modern aesthetic. ↩
-
Discover effective methods for illuminating low walls to enhance safety and aesthetics in your landscape design. ↩


