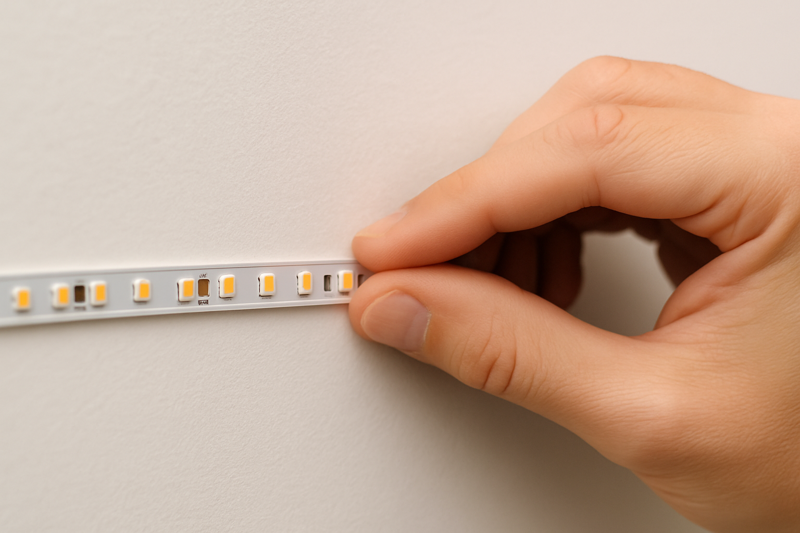
You’ve just finished a beautiful installation, but you get an angry call a month later. The LED strip is peeling off, and it’s taking a chunk of expensive paint and drywall with it.
For a damage-free installation, the key is proper surface preparation. For sensitive surfaces, use secondary mounting methods like clips or temporary adhesives. For a truly professional and secure fit, install the strips inside an aluminum channel.
Experience is a tough teacher. Early in my career, I was on a project installing accent lighting in a series of luxury condos. The walls had this expensive, textured wallpaper. The on-site installers just peeled the backing off the LED strip and stuck it directly to the wallpaper. It looked great for about a week. Then, as the building’s temperature fluctuated, the adhesive began to fail. Strips started drooping. When they tried to reposition one, it ripped a huge strip of that five-hundred-dollar-a-roll wallpaper right off the wall. It was a costly, embarrassing mistake. That day, I learned a critical lesson: the adhesive on the back of the strip is only as good as the surface you stick it to. Professional installation is about controlling all the variables, not just hoping for the best.
Why is Surface Preparation the Most Critical First Step?
You’ve installed a strip on what looks like a clean wall, but it starts to sag and fall within days. Now you have to go back to the job site, wasting time and money on a callback.
The standard adhesive on LED strips is designed for clean, dry, non-porous surfaces. Dust, grease, or textured paint creates an unstable foundation, guaranteeing that the adhesive will fail and potentially damage the wall upon removal.
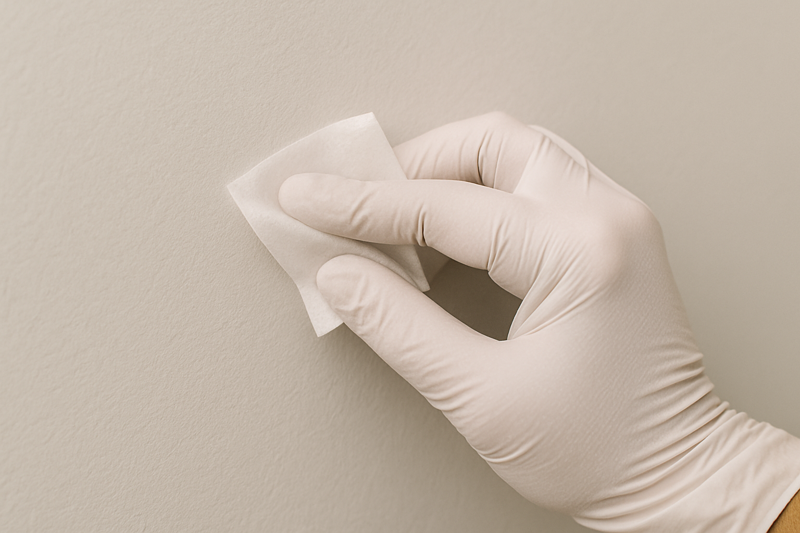
I often get questions from contractors asking if our 3M adhesive is "strong enough." I always turn the question around: "Is your surface prepared properly?" I was consulting on a large kitchen renovation. The contractor, Tom, wanted to install our under-cabinet lighting. He was ready to just stick it onto the underside of the brand-new cabinets. I stopped him and handed him a bottle of isopropyl alcohol and a clean cloth. He looked at me like I was crazy. I explained that even brand-new cabinets have a thin layer of dust, oils from handling, and maybe even a slight residue from the wood finish. Taking 60 seconds to wipe the surface clean is the difference between an installation that lasts for ten years and one that fails in ten days. It’s the cheapest insurance policy you can get for your reputation.
The Foundation of a Flawless Installation
Think of surface preparation1 like the foundation of a house. If the foundation is weak, it doesn’t matter how well-built the house is; it will eventually have problems. The adhesive on the back of a high-quality LED strip is a marvel of chemical engineering, but it cannot perform miracles. It needs a perfect surface to bond to. For a professional like Tom, who guarantees his work, skipping this step is not a shortcut; it’s a gamble. Ensuring the surface is pristine before a single inch of LED strip is applied is the hallmark of a true professional. It demonstrates a commitment to quality and an understanding of how materials interact in the real world.
| Surface Type | Preparation Steps | Risk of Damage | Jermey’s Pro Tip (Your Expertise) |
|---|---|---|---|
| Painted Drywall (Matte/Eggshell) | 1. Clean: Wipe the area thoroughly with a cloth dampened with isopropyl alcohol2 (rubbing alcohol). Do NOT use household cleaners, as they can leave a residue. 2. Dry: Allow the surface to air dry completely for at least 5-10 minutes. | Medium. The adhesive bond3 can be stronger than the paint’s bond to the drywall. Peeling is a real risk, especially with cheaper paint jobs. | Gentle Test: After cleaning, take a small piece of painter’s tape and press it firmly onto the wall, then peel it off. If you see any paint on the tape, the surface is not stable enough for direct adhesive application. Proceed to alternative methods. |
| Metal, Glass, or Laminate | 1. Clean: Wipe aggressively with isopropyl alcohol to remove any oils or manufacturing residues. 2. Dry: Ensure the surface is 100% dry. | Low. These are ideal, non-porous surfaces. The adhesive will form a very strong, stable bond without damaging the material itself. | For under-cabinet lighting on laminate surfaces, this is the best-case scenario. The key is to be absolutely sure the surface is free of any grease. In a kitchen environment, this is critical. A clean surface ensures a bond that will last for years. |
| Unfinished/Unsealed Wood | 1. Sand: Lightly sand the area with fine-grit sandpaper (220-grit) to create a smooth surface. 2. Clean: Wipe away all sawdust with a tack cloth or a slightly damp rag. 3. Seal (Recommended): Apply a thin coat of clear polyurethane or lacquer and let it cure completely. This creates a non-porous surface. | High (if unsealed). The adhesive will not stick well to the porous wood grain and will likely fail. | Do not stick LED strips directly to raw wood. The bond will be weak and temporary. Sealing the wood is not an optional step; it is mandatory for a professional-grade installation that you can stand behind. |
| Textured or Wallpapered Surfaces | Direct adhesive application is NOT recommended. The adhesive will only touch the "peaks" of the texture, creating a very weak bond. On wallpaper, the adhesive will bond to the paper, not the wall, and will cause tearing. | Very High. Failure is almost guaranteed, and damage is highly probable. | Never apply directly. For these surfaces, you must use a mechanical fastening method4. Your best option is to install a slim aluminum channel, which can be screwed into the studs through the wallpaper or textured surface for a secure, permanent installation. |
What Are the Best Damage-Free Mounting Alternatives?
You are working with delicate surfaces like wallpaper or a rental property where you can’t risk any damage. The standard peel-and-stick method is not an option. You need a secure mounting solution that is 100% removable.
Use high-quality, removable foam mounting tape (like 3M Command Strips) for lightweight applications. For more security, use screw-in mounting clips or brackets, which only create tiny, easily repairable pinholes in the wall.
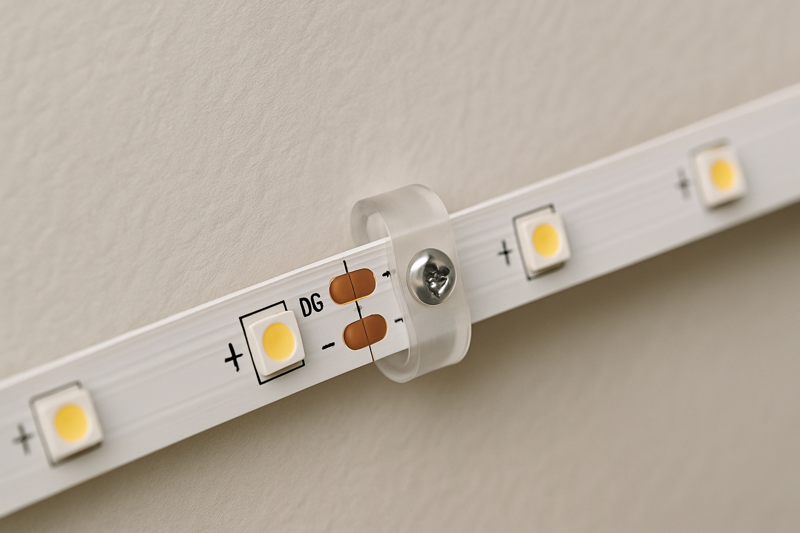
I was working with a lighting designer on a pop-up retail store. The brand was leasing the space for only six months, and the contract explicitly stated that the walls had to be left in perfect condition. They wanted to outline a series of large displays with our LED strips. We couldn’t use the built-in adhesive. The solution was simple: we used transparent mounting clips every 12 inches. We used tiny trim screws to fix them to the wall. The clips held the strip perfectly in place, and when the pop-up closed, it took them less than an hour to remove everything. All that was left were a few tiny pinholes, which were easily filled with a dab of spackle. No damage, no drama, and a very happy client.
Your Toolkit for Delicate Surfaces
As a professional, your ability to adapt to different site conditions is what makes you valuable. Not every wall is a perfect, freshly painted surface. Having a toolkit of alternative mounting solutions allows you to confidently tackle any project, from temporary event lighting to installations on historic or delicate materials. These methods separate the pros from the amateurs, showing that you think about the entire lifecycle of the installation, including removal. They provide peace of mind for both you and your client, ensuring that the lighting enhances the space without harming it.
| Method | Best Use Case | Pros | Cons | Jermey’s Pro Tip (Your Expertise) |
|---|---|---|---|---|
| Removable Adhesive Strips (e.g., 3M Command)5 | Temporary installations, dorm rooms, rental properties, very lightweight and short LED strip runs. Ideal for surfaces where no holes are allowed. | Easy to install, widely available, designed for clean removal without residue or damage. | Lower weight capacity than screw-in options. Can be bulky. May fail in humid environments (bathrooms, kitchens). | Cut the Command Strips into smaller squares and place them every 12-18 inches on the back of the LED strip, covering the original adhesive. Do not rely on one or two strips for a long run. Distribute the load evenly. |
| Mounting Clips/Brackets6 | The best all-around alternative for direct-to-wall mounting on painted drywall or wood where tiny holes are acceptable. Essential for ceiling or vertical "down-firing" installations. | Very secure grip, prevents sagging over time. Holes are tiny and easily patched. Can be used on slightly uneven surfaces. Inexpensive. | Requires tools (drill or screwdriver). Leaves small holes that will need to be filled upon permanent removal. | Don’t just use clips at the ends. Place a clip every 18-24 inches to prevent the middle of the strip from sagging. For our IP67 silicone-sleeved strips, which are heavier, I recommend placing a clip every 12 inches for maximum support. |
| Hot Glue (Low-Temp)7 | Quick, temporary fixing on robust, non-delicate surfaces8 like unfinished wood, concrete, or brick. Often used for event or stage lighting. | Fast-setting, provides a stronger initial bond than tape on rough surfaces. Can often be peeled off of hard surfaces once cooled. | Can melt the strip’s waterproof sleeve if too hot. Can be difficult to remove from painted or porous surfaces. Messy application. | Use a dual-temperature glue gun on the LOW setting. Apply small dabs of glue to the surface and then press the strip into it. This is a "tacking" method, not a permanent solution. Never use high-temp glue, as it can damage the strip’s PCB. |
| Double-Sided Mounting Tape (Heavy Duty)9 | For semi-permanent installations on surfaces where screws are not possible, like mounting on metal beams or glass partitions. | Extremely strong bond. Thicker foam can conform to slight irregularities in a surface. | Can be very difficult to remove and will almost certainly cause damage to paint or drywall. This is a high-commitment option. | This is a last resort for delicate surfaces. If you must use it, choose a high-quality acrylic foam tape (like 3M VHB). When it comes time for removal, you will need to use a heat gun and adhesive remover, and you should expect to repaint the surface. |
How Do You Remove LED Strips Without Peeling Off Paint?
The job is over, and the client wants to redecorate. It’s time to remove the LED strips you installed. You pull a corner, and a long, ugly strip of paint and paper comes off with it.
Gently heat the strip with a hairdryer to soften the adhesive. Then, use a flat, flexible tool like a putty knife or dental floss to slowly pry and slice the adhesive away from the wall, pulling the strip back on itself at a sharp angle.
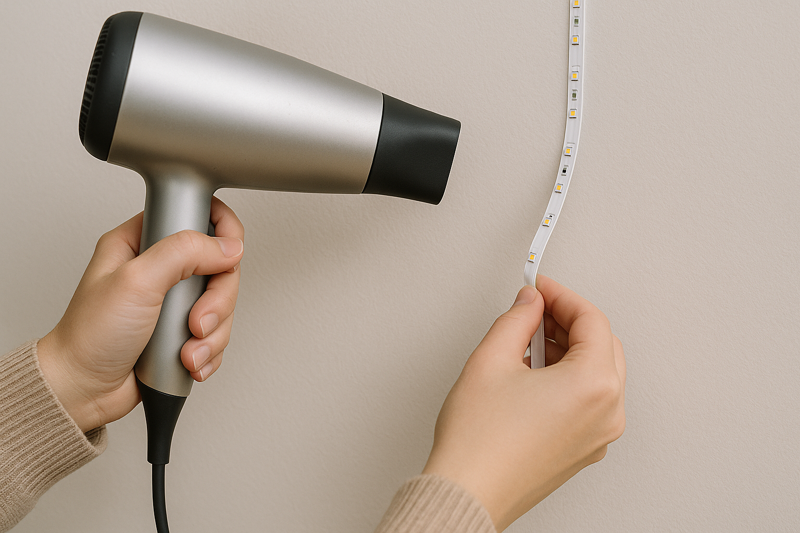
I got a call from a homeowner in a panic. He had tried to remove an LED strip that a previous contractor had installed above his cabinets, and it was tearing the paint to shreds. He was trying to yank it off the wall like a band-aid. I told him to stop immediately. I had him grab his wife’s hairdryer and some fishing line. I walked him through it on the phone: "Warm up a one-foot section for about 30 seconds. Now, slide the fishing line behind the strip and work it back and forth like you’re flossing a giant tooth." He was amazed. The strip came off cleanly, leaving the adhesive on the wall. We then used a citrus-based adhesive remover to get the residue off without damaging the paint. Patience, heat, and the right tool are what separate a clean removal from a costly repair job.
The Art of Patient Removal
The way you uninstall a product is just as important as how you install it. A professional approach considers the end of a product’s life or the client’s future needs. Rushing the removal process is the most common cause of damage. The adhesive bond10 is designed to be strong and resist perpendicular pulling forces. The secret to defeating it is to weaken it with heat and then attack it with a shearing or slicing force, parallel to the wall. This requires patience. Plan for the removal process to take time, and use the right tools to ensure you leave the surface exactly as you found it. This level of care reinforces your reputation as a conscientious and skilled professional.
| Step | Technique | Why It Works | Jermey’s Pro Tip (Your Expertise) |
|---|---|---|---|
| 1. Apply Gentle Heat | Use a hairdryer on a medium heat setting. Hold it 2-3 inches from the strip and move it back and forth along a 1-2 foot section for 30-60 seconds. | Heat softens the acrylic adhesive, breaking down its chemical bond and making it more pliable and less likely to take paint with it. | Do not use a high-powered heat gun. A heat gun can get hot enough to melt the strip’s plastic components and can easily blister or scorch the paint on the wall. A simple hairdryer is all you need. |
| 2. Pry an Edge | Start at one end. Try to lift a corner with your fingernail. If it doesn’t come up easily, use a plastic putty knife11 or a credit card to gently work your way under the edge. | You need to create a small gap to start the peeling process without applying too much force initially. A plastic tool is less likely to scratch or gouge the wall surface than a metal one. | If the edge is stubborn, use a cotton swab to apply a small amount of rubbing alcohol or a citrus-based adhesive remover right at the edge. Let it sit for a minute to penetrate and then try prying again. |
| 3. Peel & Slice | Once you have an edge, do not pull the strip straight out from the wall. Instead, pull it back on itself at a sharp 180-degree angle. For extra stubborn adhesive, slide dental floss or fishing line behind the strip and use a sawing motion to slice through the softened adhesive. | Pulling at a sharp angle creates a "peeling" force rather than a direct "pulling" force, which is much less likely to delaminate the paint. The floss/fishing line method mechanically slices the adhesive, separating the strip from the wall with almost zero pulling force. | The dental floss method12 is my go-to trick for high-value surfaces. It’s slow, but it’s the safest method I know. It physically cuts the bond, which is far more elegant than trying to brute-force it. |
| 4. Remove Residue | After the strip is removed, you will likely have some sticky residue left. Rub it gently with your thumb to ball it up. For what’s left, use a cloth with Goo Gone13, WD-40, or a citrus-based cleaner14. | These oil-based solvents are excellent at breaking down the remaining adhesive without being harsh on most cured paint finishes. | Always test your cleaner on a small, inconspicuous spot first! Make sure it doesn’t discolor or soften the paint. After cleaning the residue, wipe the area with a cloth dampened with a little soapy water, and then finally with a clean, dry cloth. |
Conclusion
Professional installation is about preparation, using the right mounting method for the surface, and planning for clean removal. This protects the wall, the client’s investment, and your reputation.
Understanding surface preparation is crucial for ensuring a successful installation and avoiding future issues. ↩
Discover why isopropyl alcohol is preferred for cleaning surfaces before applying adhesives. ↩
Learn about adhesive bonds to ensure your installations are durable and effective on various materials. ↩
Find out about mechanical fastening methods to secure LED strips effectively on challenging surfaces. ↩
Explore how these strips can provide a damage-free solution for temporary installations. ↩
Learn about the secure grip and ease of use that mounting clips offer for various surfaces. ↩
Discover the quick and effective bonding capabilities of low-temp hot glue for temporary fixes. ↩
Explore strategies to protect delicate surfaces while achieving effective lighting installations. ↩
Understand the strong bond and potential risks of using heavy-duty tape for delicate surfaces. ↩
Understanding adhesive bonds can help you choose the right removal techniques and avoid damage. ↩
Learn why plastic tools are safer for surfaces and how they can prevent damage during removal. ↩
Discover this effective technique that minimizes damage and ensures a clean removal. ↩
Find out how Goo Gone can simplify your cleanup process and leave surfaces spotless. ↩
Explore the advantages of natural cleaners that are effective yet gentle on surfaces. ↩


