A section of your client’s expensive outdoor lighting has failed. Now you face a difficult choice: is a quick fix worth the risk, or is a full replacement the only professional solution?
Repairing is only viable for isolated, correctable issues like a single failed connector on an otherwise healthy, high-quality strip. Replacement is necessary when you see systemic problems like water damage, widespread discoloration, or failures on low-cost, aging strips.
As a manufacturer, I field this question constantly. An installer calls me, frustrated, with a photo of a partially failed strip. "Jermey, can I just cut out this dead section and splice in a new one?" My answer is always another question: "What caused the failure?" A quick fix might get the lights back on for a week, but if you haven’t solved the root problem—like a compromised waterproof seal or a failing power supply—you’re just setting yourself up for another angry call from your client. The decision to repair or replace isn’t just about the cost of a meter of LED strip; it’s about protecting your reputation, your time, and your client’s long-term satisfaction.
When Is It Smart to Repair an Outdoor LED Strip?
You’ve found a single, small dead spot in a long and expensive installation. Is it truly necessary to replace the entire run, or can a targeted repair save the day and the budget?
Repairing makes sense only for localized, non-systemic failures on a high-quality strip. This typically includes issues like a failed solder joint, a damaged connector, or minor physical damage to a small, isolated section.
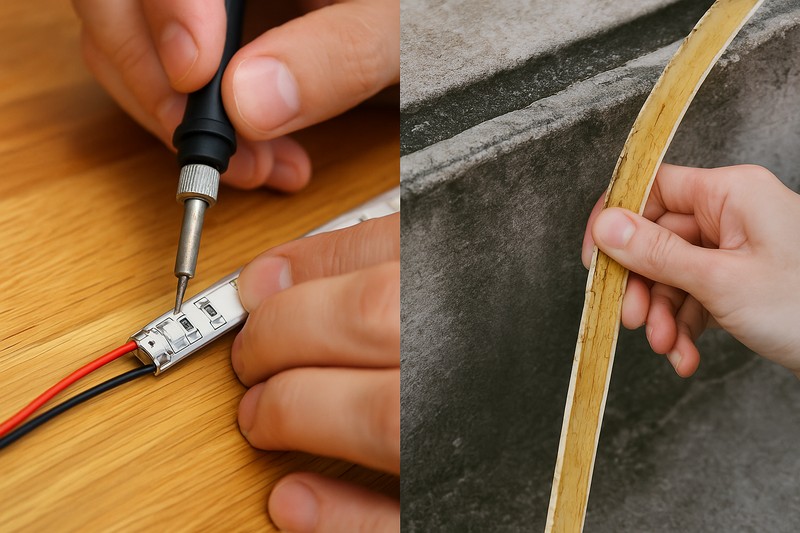
I remember working with a contractor who had installed our premium IP67 silicone strips on a multi-million dollar architectural project. A year later, a one-foot section at the very end of a 30-foot run went dark. He was worried he’d have to replace the whole thing, which would be a costly and visible repair. I asked him to send me a close-up photo. It turned out a piece of scaffolding from another trade had accidentally nicked the strip, severing the circuit at that one point. The rest of the strip was in perfect condition. In that case, a repair was the perfect solution. He carefully cut out the damaged inch, soldered in a new waterproof connector, and sealed it with marine-grade heat shrink. The repair was invisible and the strip was 100% functional. This was smart because the core product was sound; the problem was external and isolated.
The Repair Checklist: Is the Strip a Good Candidate?
Before you attempt any repair, you must first qualify the situation. If you can answer "yes" to all of the following questions, a repair is a viable option.
- Is the Failure Isolated?1 Is the problem confined to one specific spot? For example, is there a single 3-inch dead section with the rest of the strip working perfectly? This suggests an issue like a single bad solder joint or a damaged component, not a systemic failure. If multiple sections are failing randomly, it’s a sign of a deeper problem.
- Is the Rest of the Strip in Good Health?2 Look at the non-failing sections. Is the protective jacket still clear, flexible, and free of cracks or yellowing? If the rest of the strip looks old, brittle, or discolored, it means the materials are degrading. A repair at one point is just a temporary fix before the next section fails. You should only repair a strip that is otherwise in excellent condition.
- Was the Cause External and Identifiable?3 As in the story I shared, can you point to a specific cause, like physical damage? Another example is a single connector that was improperly sealed and failed. If the cause is something you can fix (e.g., resealing a connector properly), a repair is logical. If the strip failed for no apparent reason, it implies a manufacturing defect or that it has reached the end of its life.
Here’s a breakdown of common, repairable scenarios:
| Scenario | Root Cause | Recommended Repair Action | Required Materials |
|---|---|---|---|
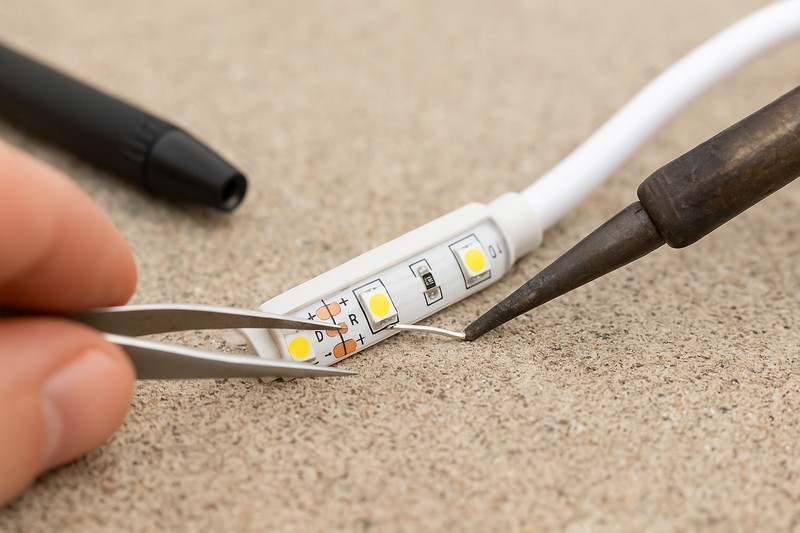
| Single Dead Section4 | Bad solder joint or damaged LED/resistor. | Cut out the smallest possible section (at the cut marks) and splice the strip back together using a waterproof connector or by soldering jumper wires. | Soldering iron, waterproof connectors, adhesive-lined heat shrink tube. |
| Flickering at Connector | A loose or corroded connection. | Cut off the old connector, strip the wires, and install a new, high-quality waterproof connector. | New waterproof connector, wire strippers, heat gun. |
| Minor Physical Cut | External damage (e.g., from a tool). | If the circuit is broken, cut and splice. If it’s just a jacket tear, seal it with high-grade, neutral-cure silicone sealant. | Silicone sealant, splicing materials if needed. |
A professional repair requires using the right tools and materials. You must be able to make a connection that is as durable and waterproof as the original factory seal. If you can’t guarantee that, you should opt for replacement.
When Must You Replace the Entire LED Strip?
You’ve fixed one dead section, and now another has failed a month later. Your "repair" has turned into a series of frustrating and costly site visits, and your client is losing confidence.
You must replace the entire strip when you see signs of systemic failure. This includes widespread water ingress (fogging, multiple dead zones), UV damage (yellowing, cracking jackets), or if the strip is a low-quality product to begin with.
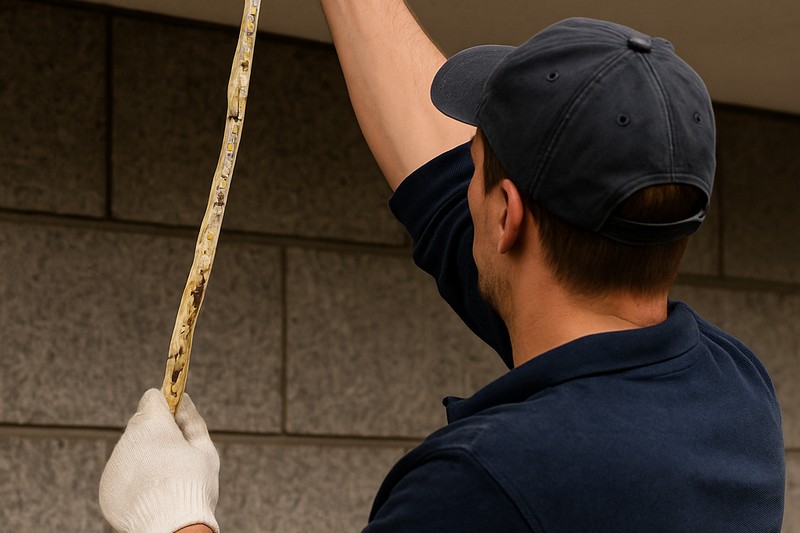
This is the situation Tom, my distributor client, often faces with new customers who come to him after buying cheap products online. An installer came to him in a panic. He’d put up 100 meters of cheap, epoxy-coated IP65 strips around a hotel pool. After the first summer, not only had the strips turned a disgusting yellow, but random sections all over the installation were flickering or dead. The hotel manager was furious. The installer asked Tom if he could just buy a few meters to patch the bad spots. Tom wisely told him, "No. The entire product has failed. The materials are not suitable for the application. If you patch it, more sections will die, and this problem will never end. You need to replace everything with a proper IP67 silicone product." It was a tough pill for the installer to swallow, but it was the only way to save the project and his relationship with the hotel.
Red Flags: The Undeniable Signs for Replacement
Repairing a strip with any of the following symptoms is a waste of time and money. It’s like putting a small patch on a tire that is completely rotten.
- Water Ingress and Condensation5: If you can see moisture, fogging, or water droplets inside the strip’s jacket, the entire waterproof seal has been compromised. Water has wicked its way down the internal circuitry. Repairing one section is pointless as corrosion has already started elsewhere. This is an immediate, non-negotiable replacement.
- UV Degradation (Yellowing/Brittleness)6: If the strip’s protective jacket is turning yellow, cloudy, or brittle, the material itself has failed. It can no longer protect the LEDs from the elements and is aesthetically unacceptable. This is a sign of using cheap PVC or epoxy instead of quality silicone. The entire run must be replaced.
- Multiple Failing Sections7: If you have more than one or two random dead spots, it’s not a localized issue. It points to a larger problem, such as a failing batch of LEDs, widespread corrosion from a tiny leak, or the strip simply reaching the end of its useful life.
- Unknown or Low-Quality Origin8: If the strip was a cheap, no-name product sourced from a marketplace, its long-term reliability is questionable. These products often use lower-grade LEDs, thinner copper PCBs, and inadequate waterproofing. When they start to fail, it’s a sign that the whole system is built on a weak foundation. Don’t try to be a hero; replace it with a professional-grade product from a reputable supplier like Rhlite.
Here’s a decision matrix to help you choose:
| Symptom Observed | Root Cause Analysis | Repair or Replace? | Your Professional Justification |
|---|---|---|---|
| One small, distinct dead section | Likely a single component failure or minor damage. | Repair | The rest of the system is healthy; a targeted fix is efficient. |
| Fogging or water inside the jacket | Total failure of the waterproof seal. | Replace | Widespread corrosion is inevitable; the strip is compromised. |
| Jacket is yellow and cracking | Material failure due to UV exposure. | Replace | The protective layer is gone; total failure is imminent. |
| Multiple, random dead spots | Systemic failure (bad LEDs, corrosion, end of life). | Replace | Patching one spot will not stop others from failing. |
Choosing to replace a failing system with a high-quality one isn’t an admission of failure. It’s a demonstration of your commitment to providing a long-term, reliable solution for your client. It builds trust and establishes you as an expert.
How Do Power and Connections Factor into the Decision?
The lights are dimming, flickering, or dead, but the LED strip itself looks physically fine. Before you blame the strip, could the problem lie with the power supply or the wiring?
Always test the power supply and connections first. Many "failed" LED strips are actually perfectly fine; the problem is often a failing driver, a corroded connector, or voltage drop from undersized wiring. Replacing these is a much simpler, cheaper repair.
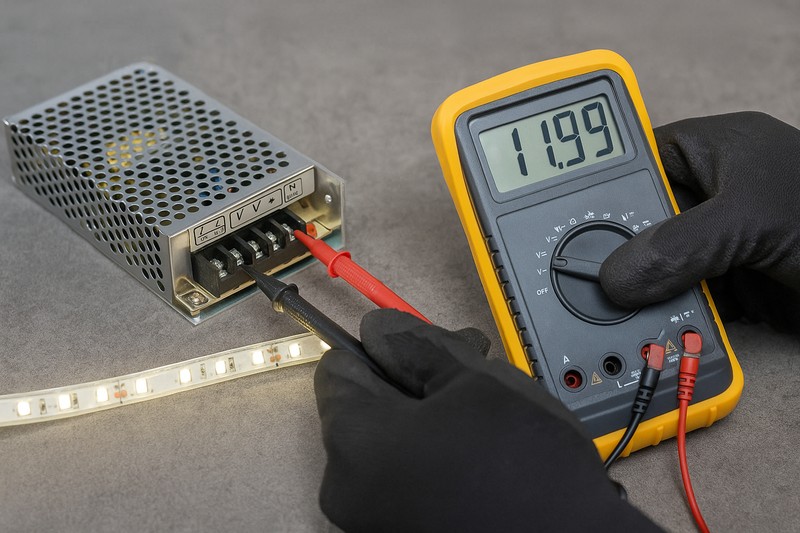
I always tell my clients to start their diagnosis at the power source. An architect I work with was having flickering issues on a landscape project. The original installer immediately quoted a huge price to replace all the LED strips. The property owner called me for a second opinion. I told him to have an electrician test the voltage. It turned out the "outdoor" power supply they had used was a cheap, unsealed model that had water inside it. The output voltage was unstable. The LED strips were our high-quality Rhlite products and were completely unharmed. They replaced the single power supply for a fraction of the cost, and the entire system worked perfectly. The first installer almost cost the client thousands and his own reputation by failing to do a simple 5-minute diagnostic test.
Diagnosing the System Before the Strip
Before you even think about touching the LED strip itself, perform these checks. This is the workflow of a true professional.
- Check the Power Supply (Driver)9: Use a multimeter to test the DC voltage output of the power supply. Is it stable and correct (e.g., 24V +/- 5%)? If the voltage is low, fluctuating, or zero, the power supply is the culprit. Outdoor power supplies, especially lower-quality ones, can fail due to heat or moisture. This is the most common cause of a completely "dead" system.
- Inspect All Connections10: Look at every single connection point between the power supply and the strip. Are the wire nuts or terminals corroded? Is the waterproof sealant on a connector still intact? A single bad connection can take down an entire run. This is especially true in coastal or humid areas where salt in the air can accelerate corrosion. Often, simply cutting out a bad connector and making a new, clean, waterproof one can solve the problem.
- Test for Voltage Drop11: On long runs, measure the voltage at the beginning of the strip and at the very end. If you see a significant drop (e.g., a 24V system reading 23.5V at the start but only 20V at the end), you have a voltage drop problem. This can be caused by a run that is too long or lead wires that are too thin. The strip itself isn’t failing; the power isn’t reaching it properly. The "repair" in this case might involve adding a second power feed to the end of the strip.
This table guides your troubleshooting process:
| Symptom | First Thing to Check | Possible Cause | Solution (Repair/Component Swap) |
|---|---|---|---|
| Entire Strip is Dead | Power Supply Output | Failed or tripped power supply. | Test and replace the power supply unit. |
| Entire Strip Flickers | Power Supply or Main Connection | Unstable power supply or a loose main connection. | Test power supply; clean and re-secure all primary connections. |
| End of Strip is Dim/Yellow | Voltage at End of Strip | Excessive voltage drop. | Add a power feed to the end of the strip; upgrade to thicker gauge wire. |
| Section After a Connector is Dead | The Connector Itself | Corroded or failed connector12. | Cut out the old connector and install a new waterproof one. |
Only after you have confirmed that the power supply is stable and all connections are clean and delivering the correct voltage should you consider that the LED strip itself has failed. This systematic approach saves time, money, and prevents you from replacing perfectly good products.
Conclusion
Analyze the root cause before deciding. Repair isolated faults on healthy strips, but always replace a system showing widespread material degradation like yellowing or water ingress. This protects your reputation.
Understanding isolated failures can help you determine if a repair is feasible or if deeper issues exist. ↩
Learn how to evaluate the overall condition of your strip to ensure a successful repair. ↩
Identifying external causes can guide you in making effective repairs and avoiding future issues. ↩
Discover step-by-step methods to fix single dead sections, ensuring your LED strips work efficiently. ↩
Understanding the impact of water ingress can help you make informed decisions about LED strip replacements. ↩
Learn about UV degradation to ensure your LED strips maintain their quality and longevity. ↩
Discover the underlying issues of multiple failing sections to prevent future failures in your lighting systems. ↩
Explore the dangers of low-quality LED strips to ensure you invest in reliable and durable lighting solutions. ↩
Understanding how to properly test a power supply can prevent costly mistakes and ensure your LED strips function correctly. ↩
Learning effective inspection techniques can help you identify issues quickly, saving time and enhancing the longevity of your LED installations. ↩
Exploring solutions for voltage drop can improve the performance of your LED strips, ensuring consistent brightness and efficiency. ↩
Preventing corrosion is crucial for maintaining reliable connections, which can significantly extend the lifespan of your LED lighting system. ↩


