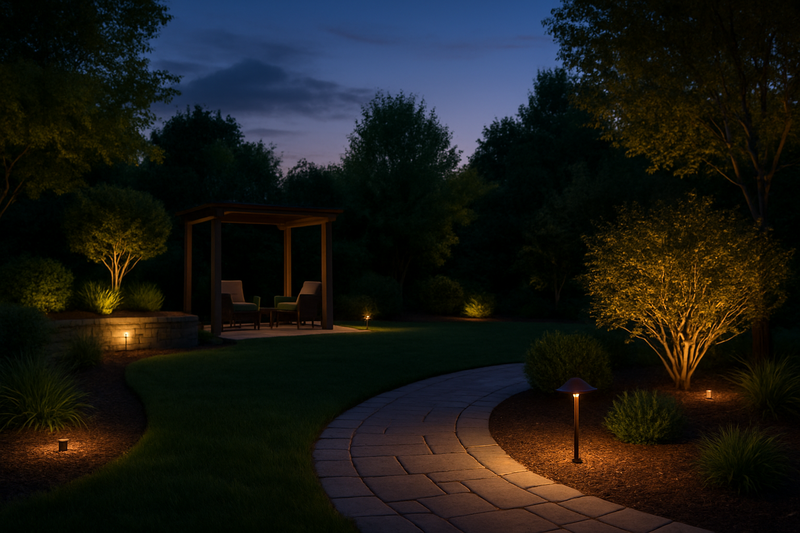
Your client loves the new outdoor lighting, but their next electricity bill comes as a shock. Now they’re questioning the efficiency of the beautiful system you installed, putting you on the defensive.
To reduce energy use, choose high-efficacy LED strips, use smart controls like dimmers and timers, apply energy-conscious lighting design principles, and select the correct system voltage (12V vs. 24V) for your project’s scale.
As a factory that engineers LED lighting systems, efficiency is at the core of our design process. I’ve learned that reducing energy consumption isn’t about making sacrifices or settling for dim lighting. It’s about being smarter with your product selection and design, a strategy that saves your clients money and makes your projects more competitive.
Does Choosing a High-Efficiency LED Strip Really Matter?
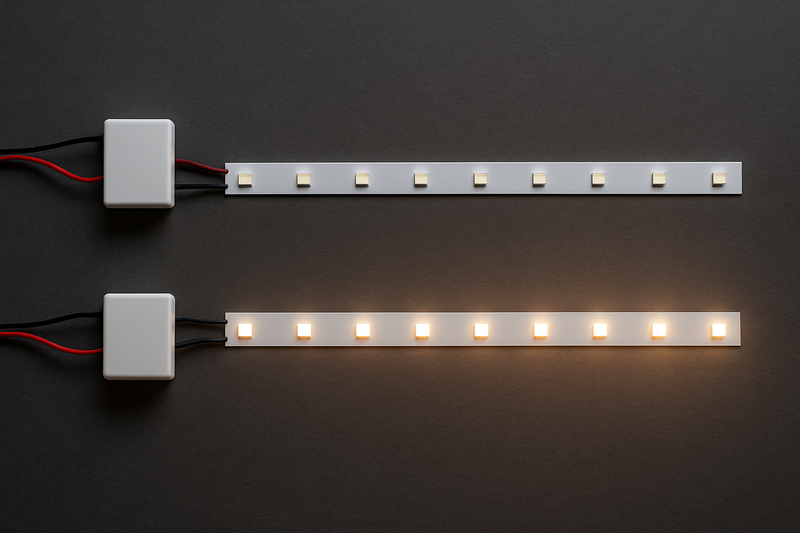
You’re sourcing LED strips for a big project, and you see two options. One is cheaper, but the other is advertised as "high efficiency." You wonder if paying a little extra for efficiency is worth it.
Yes, it absolutely matters. A high-efficiency strip produces more light (lumens) for every watt of power it consumes. This means you can achieve the same brightness with less energy, leading to smaller power supplies and lower long-term running costs.
From a manufacturing standpoint, efficiency is a direct indicator of quality. It points to better LED chips, smarter circuit design, and superior materials. For my B2B clients like Tom, choosing a high-efficacy strip is the first and most impactful decision in designing an energy-saving lighting system.
The Power of Efficacy
Think of efficiency not as a feature, but as the foundation of your system.
What is Luminous Efficacy?
The key metric here is "luminous efficacy," measured in lumens per watt (Lm/W). It’s like "miles per gallon" for a light source. A strip with a high Lm/W rating is simply better at its job of converting electricity into light instead of wasting it as heat. For example, a high-quality strip might offer 120 Lm/W, while a standard-quality strip might only offer 80 Lm/W.
The Ripple Effect on Cost
Choosing the 120 Lm/W1 strip means you need one-third less power to get the exact same amount of light. This has a powerful effect on the entire project’s cost. It means you can use a smaller, less expensive power supply. If it’s a solar-powered project, it means you can use a smaller panel and a smaller battery. Over the 5-10 year lifespan of the installation, the electricity savings alone can be substantial. For a large commercial project, this translates into thousands of dollars in savings.
| Feature | Standard Quality Strip | High-Efficacy Strip | Advantage |
|---|---|---|---|
| Luminous Efficacy | 80 Lm/W | 120 Lm/W1 | Produces 50% more light for the same energy. |
| Power for 1200 Lumens | 15 Watts | 10 Watts | Requires 33% less power. |
| Required Power Supply | Larger | Smaller & Cheaper | Lower upfront hardware cost. |
| Heat Generated | More | Less | Longer lifespan for the LEDs. |
How Can Dimmers and Timers Drastically Cut Energy Use?
Your client’s brand new landscape lighting runs at 100% brightness from dusk until dawn. You know this is a massive waste of energy, especially in the middle of the night when no one is outside to appreciate it.
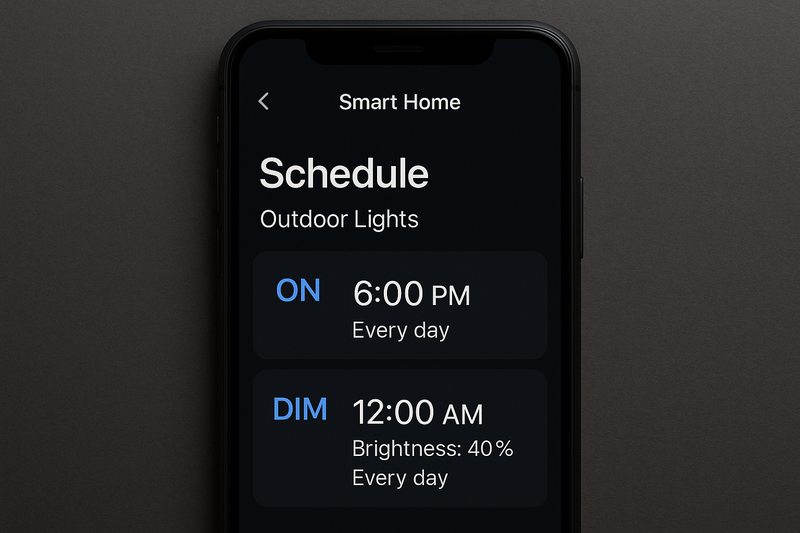
Dimmers and timers are essential tools that automate energy savings. Timers ensure lights are only active when needed, while dimmers lower the brightness during off-peak hours, directly reducing power consumption without sacrificing functionality.
I tell my clients that installing a lighting system without controls is like buying a car with no accelerator pedal—it’s just stuck on full blast. Integrating simple controls is the easiest way to add value and intelligence to any lighting installation, turning a static setup into a dynamic, efficient system.
Intelligent Light Control
Control is what separates a basic installation from a professional one.
The Power of Dimming
Most LED strips are far brighter than they need to be for ambient or accent lighting. Dimming a strip to 50% of its maximum brightness can reduce its energy consumption by nearly 50%. Visually, the human eye barely perceives the difference between 100% and 80% brightness, but this 20% reduction in power yields significant energy savings over time. Using a dimmer allows you to set the perfect brightness for the scene, preventing wasteful over-lighting.
The Logic of Timers and Sensors
Why run lights when no one is there?
- Astronomical Timers2: These smart timers automatically adjust to the changing seasons, turning lights on at dusk and off at dawn.
- Scheduled Dimmings: You can program the system to be at 100% from dusk until 11 PM, then automatically dim to a 30% "security level" until dawn. This simple schedule can cut nightly energy use in half.
- Motion Sensors3: For pathways and entryways, a motion sensor can keep lights at a low 20% level, then ramp up to 100% when someone approaches, providing safety without constant energy burn.
| Control Method | How It Saves Energy | Best Application |
|---|---|---|
| Dimmer | Reduces total power draw by lowering brightness. | Setting ambient light levels, aesthetic scenes. |
| Simple Timer | Turns lights off completely for set hours. | Holiday lighting, commercial signage. |
| Smart Timer | Automates on/off times and dimming schedules. | Primary landscape and architectural lighting. |
| Motion Sensor | Activates light only when motion is detected. | Security lighting, pathways, stairways. |
Can Smart Lighting Design Reduce Power Needs?
A client wants to light up their entire backyard. The default plan is to run bright LED strips around the whole perimeter, requiring a huge power supply and resulting in a flat, uninspired look.
Absolutely. A smart design uses light surgically, placing it only where needed for tasks, safety, or accents. This layered approach often uses less light, and therefore less power, to create a far more beautiful and dramatic effect.
This is where I often guide my clients who are more focused on products than aesthetics. Less is almost always more in lighting design. Instead of overwhelming a space with light, we can use a fraction of the power to create focal points, depth, and character. A good design is inherently energy-efficient.
Designing with Light, Not Just Fixtures
Think like a painter, not just an installer.
Use Light Layers
Professional designers think in three layers. Instead of one powerful light source, they combine multiple, lower-power sources.
- Ambient Light: General, soft illumination for overall visibility. Here, a low-wattage, dimmed strip works perfectly.
- Task Light: Focused, brighter light for safety-critical areas like stairs, pathways, and doorways.
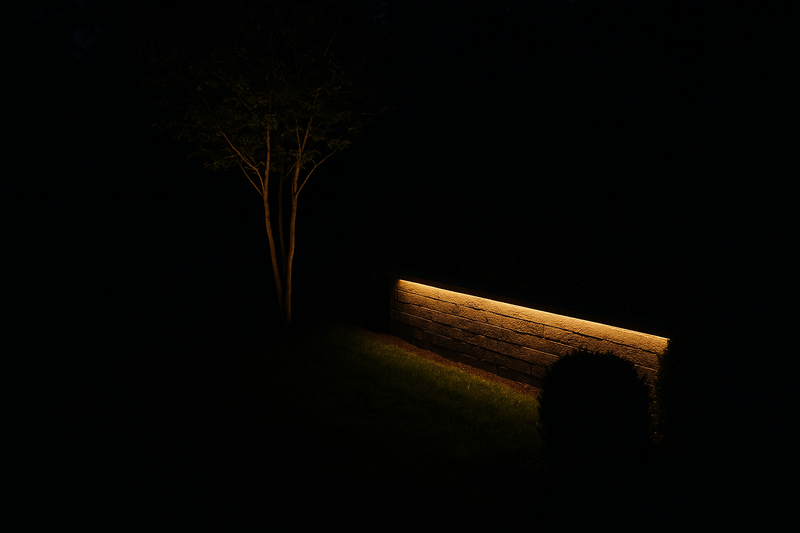
- Accent Light: Dramatic light to highlight features like a beautiful tree, a stone wall, or a statue.
By combining these, you use less total wattage than if you tried to make one powerful light do all three jobs.Location and Direction Matter
Where you place the light is critical. For example, washing a light-colored wall with a low-power strip can make the entire area feel brighter through reflection, using less energy than a powerful light shining into open space. Hiding strips under railings or overhangs creates a sophisticated glow with minimal hardware and power.
| Design Strategy | How It Saves Energy | Example |
|---|---|---|
| Layering Light4 | Uses multiple low-power sources instead of one high-power source. | A dim accent on a tree, a brighter strip on stairs. |
| Strategic Placement | Focuses light exactly where it’s needed, reducing waste. | Uplighting a column instead of flooding a porch. |
| Using Reflection5 | Bounces light off surfaces to amplify brightness. | Washing a light-colored wall with a low-wattage strip. |
| Right-Sizing Strips | Using lower-wattage strips for accents. | A 2W/m strip for a subtle glow vs. a 15W/m for tasks. |
Does Using a 24V System Instead of 12V Save Energy?
You’re installing a 50-foot run of LED strip lighting along a long driveway. You know that with a 12V system, the end of the strip will be noticeably dimmer than the beginning, a clear sign of power loss.
Yes, for long installations, a 24V system is significantly more energy-efficient. It reduces the energy lost as heat in the wiring—a phenomenon called voltage drop—ensuring more power from the supply makes it to the LEDs.
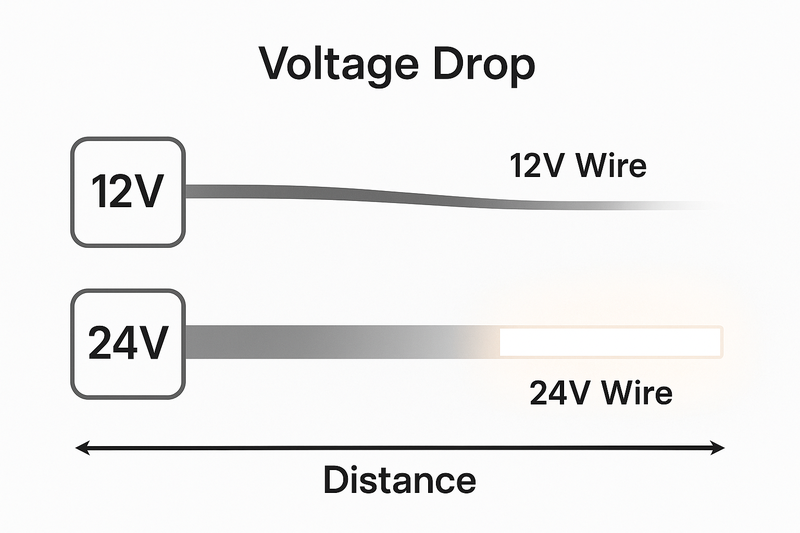
As an engineer and manufacturer, this is a key technical point I stress for large-scale projects. Voltage drop isn’t just an aesthetic problem that causes dimming; it is literally electricity being wasted as heat in your copper wires before it ever even reaches the light.
The Technical Advantage of 24V
Understanding this simple physics Ccncept is key to efficient system design.
The Problem of Voltage Drop
Power is a product of Voltage and Current (Watts = Volts x Amps). To deliver the same amount of power, a 24V system only needs to push half the current (amps) that a 12V system does. This is critical because the amount of energy lost in a wire is directly related to the square of the current. By halving the current, a 24V system cuts this resistive power loss by a factor of four. That is a massive gain in efficiency.
The Practical Result
This means for any run longer than about 30 feet (10 meters), a 24V system6 will deliver more consistent brightness from start to finish. It also allows you to use thinner, less expensive copper wire for the same run compared to a 12V system, saving on material costs. All that energy saved from not heating up the wires is energy you don’t have to pay for.
| System | Typical Current (for 96W Load) | Power Loss in Wire7 | Recommended Max Run Length |
|---|---|---|---|
| 12V DC System | 8 Amps | High | ~30 feet / 10 meters |
| 24V DC System | 4 Amps | Low (75% less) | ~60 feet / 20 meters |
Conclusion
Energy efficiency is smart design. Combine high-efficacy strips with intelligent controls and a well-planned, properly-voltaged system to dramatically reduce power consumption, save money, and deliver superior, sustainable lighting projects.
Explore the advantages of 120 Lm/W LED strips to understand how they can save energy and costs in your projects. ↩ ↩
Explore how Astronomical Timers can optimize your lighting schedule and save energy effectively. ↩
Learn how Motion Sensors enhance safety and reduce energy consumption by activating lights only when needed. ↩
Learn about the advantages of layering light for energy savings and creating a more dynamic atmosphere. ↩
Explore how using reflection can enhance brightness and save energy in your lighting design. ↩
Explore the advantages of a 24V system, including energy efficiency and cost savings on materials. ↩
Understanding power loss in wires can help you optimize your electrical systems for better performance and savings. ↩


